Dimensioning the Legs
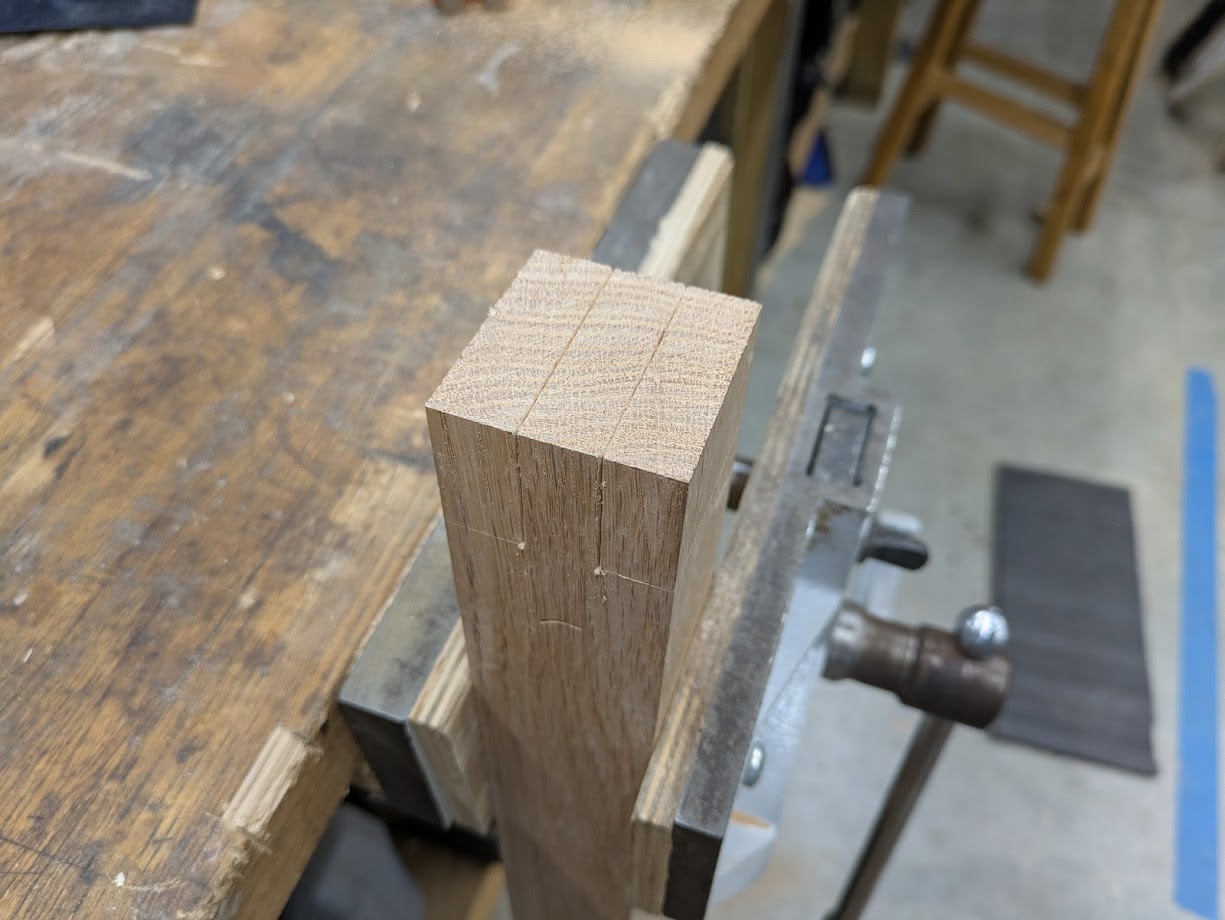
Picking right up where we left off, while the glue on the top dries, I started dimensioning the legs. On this build I wasn’t too particular about getting all the pieces to be exactly the same size, which bit me a little bit in the end. I don’t think I saved much time and I ended up having to make lots of adjustments that otherwise would have been simpler if I had just taken the extra hour to get each leg to be as close as possible to the same size. Either way you at the very least need a solid set of reference faces, so I planed each piece flat and marked the reference faces and edges so I had consistent measurements all the way around.
Of course, you might have square, flat looking boards, but still have a twist. To account for that, I made these winding sticks years ago to indicate if there was any twist in narrow boards. They simply exaggerate any twist to the point where it’s noticeable. From there I usually just plane a few strokes diagonally from high spot to high spot, then check for twist again.
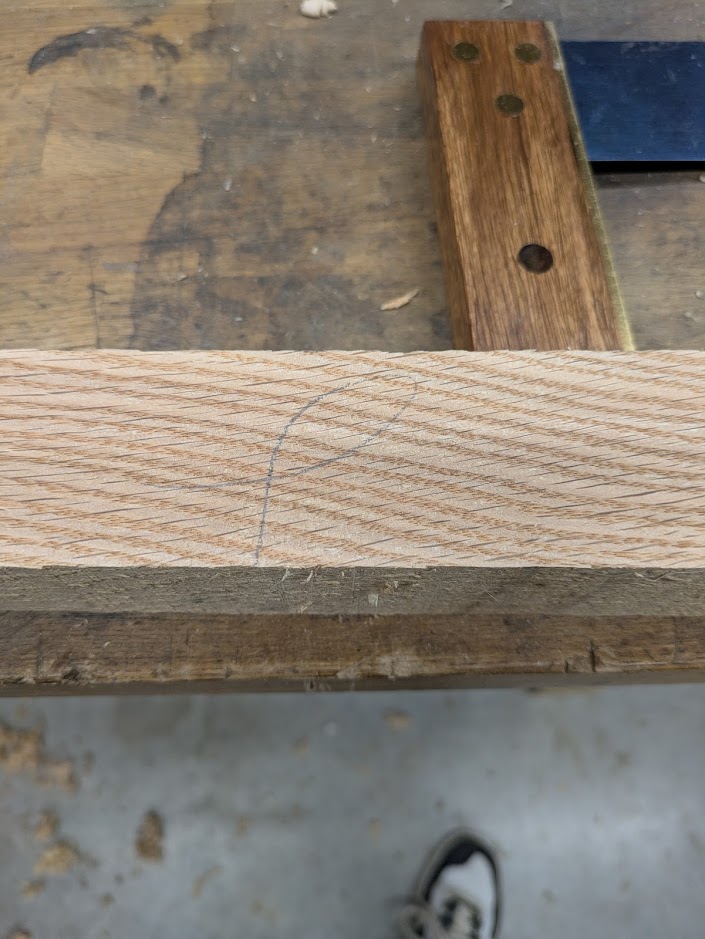
Once the boards are all nice and flat-ish and square-ish, and about the same size-ish, I need to mark out the tenons. I could use my marking guage and painstakingly lay out two different marks and hope I didn’t miss any or that my guage moved ever so slightly out of alignment, or I can do the sane thing and make one of these handy little gadgets: a scratch stock. I don’t know if that’s actually the name for it, but it kind of fits.
The great thing about this little tool is it takes all of 5 minutes to slap together, but it doubles the speed of laying out mortises and tenons. Since I had 16 mortises and 16 tenons to cut, that’s a whole ton of time saved. Plus the accuracy is as good or better than using a marking guage. Here you can see how it leaves a nice line for cutting each piece of joinery.
Cutting the Joints
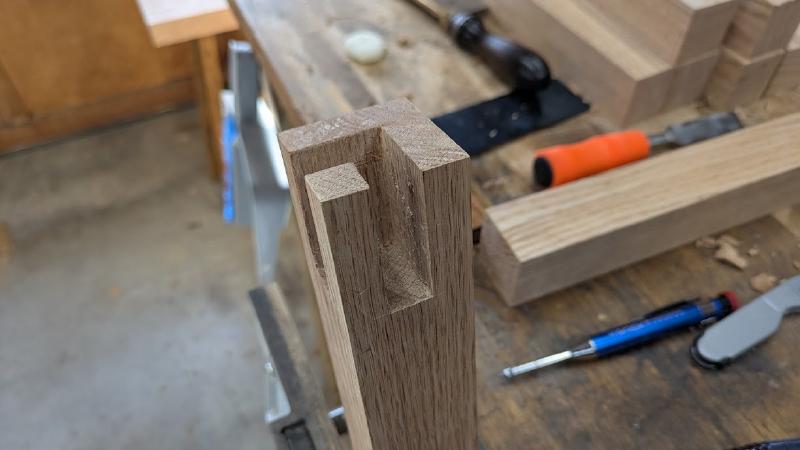
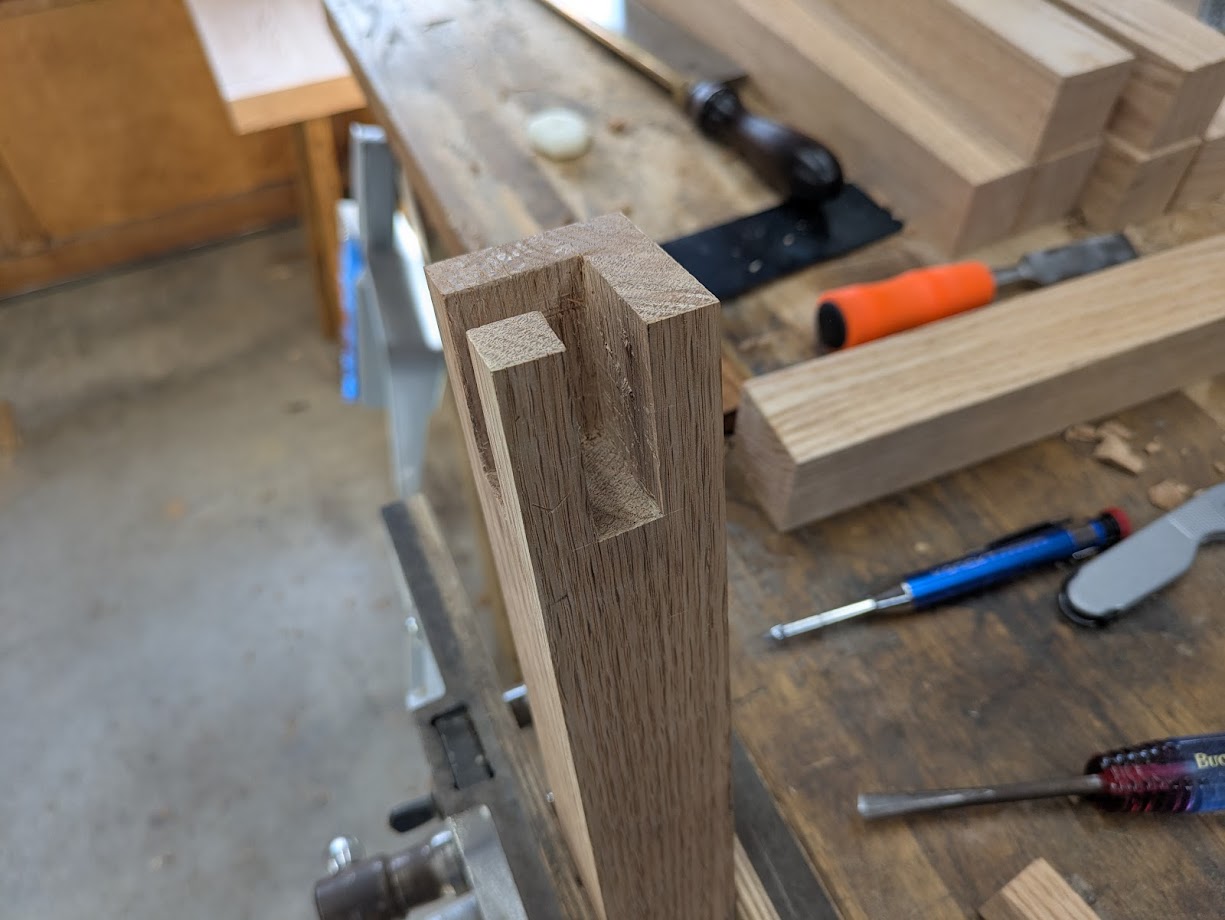
For no particular reason at all I started with the top mortises. Since they were going straight up to the table top, and because I was not cutting shoulders all the way around my tenons, these ended up being really easy to make. They ended up looking like castle walls. To make these cuts I sawed down to the line on both sides, then chopped the waste with a chisel. Since I had access to the top face, it was really easy to clear the waste and get nice square cuts.
From there it was a matter of cutting down the tenons to fit. As a beginner I would try to cut everything to fit exactly on my first try but lacked the skill to actually pull it off so I ended up with loose fitting joints. As I’ve improved, I’ve learned it’s better to cut the mortises as closely to the right dimension as possible, then deliberately cut the tenons a little fat. Once you’ve trimmed them down, you can test fit. Any tight spots will burnish the wood (make it shiny) and you can simply pare that down with a chisel until you get a nice snug fit.
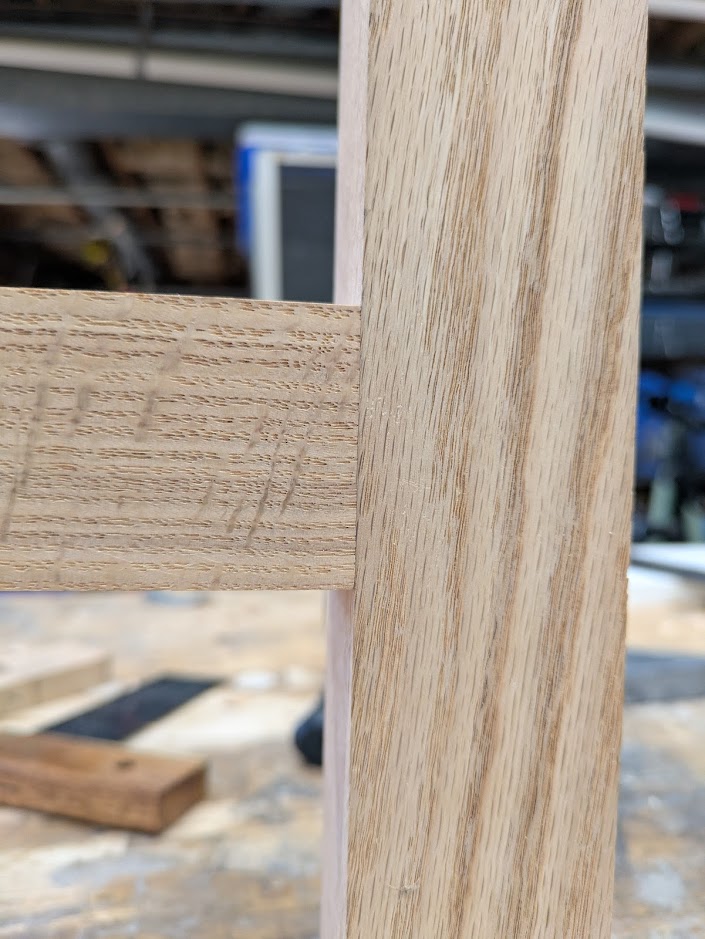
As you can see in the above, I chose a mitred tenon. In the future I probably wouldn’t waste my time. No one but you and me know it’s there, and it was more trouble than it was worth getting the faces to match. Next time I’m either doing a half depth cut, or some other variation that doesn’t involve cutting 45 degree angles with any kind of precision. I ended up being rather liberal with the cutting by the end of the project so they wouldn’t interfere with final assembly.
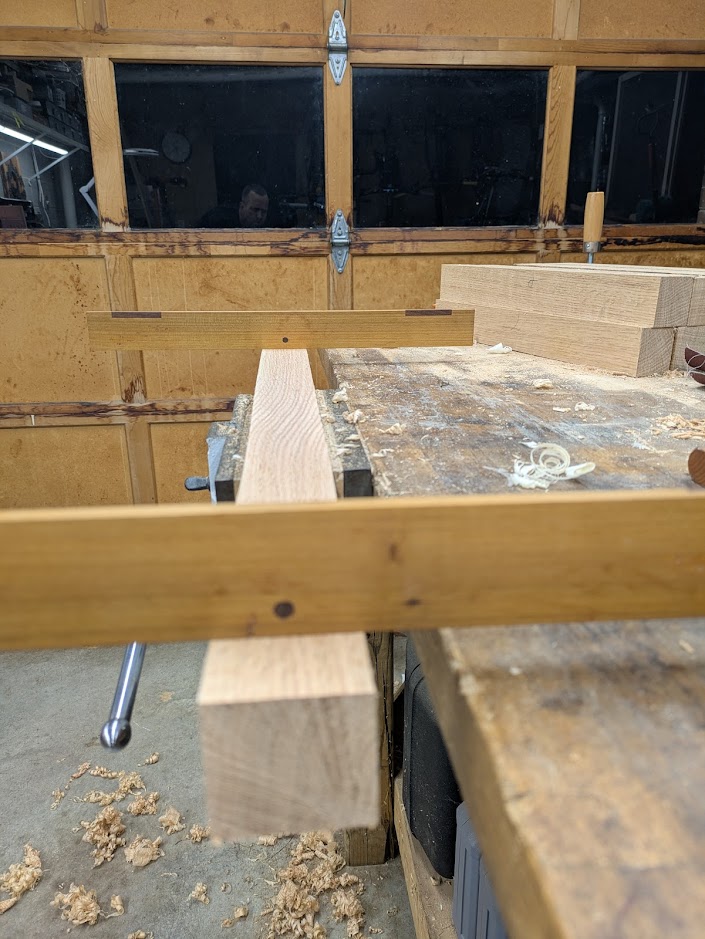
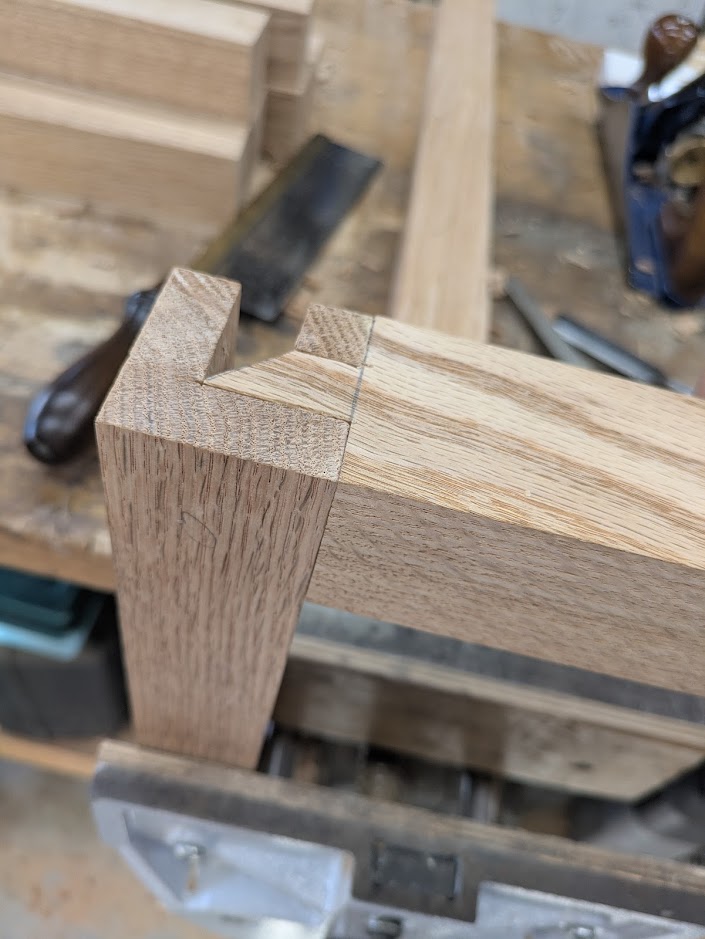
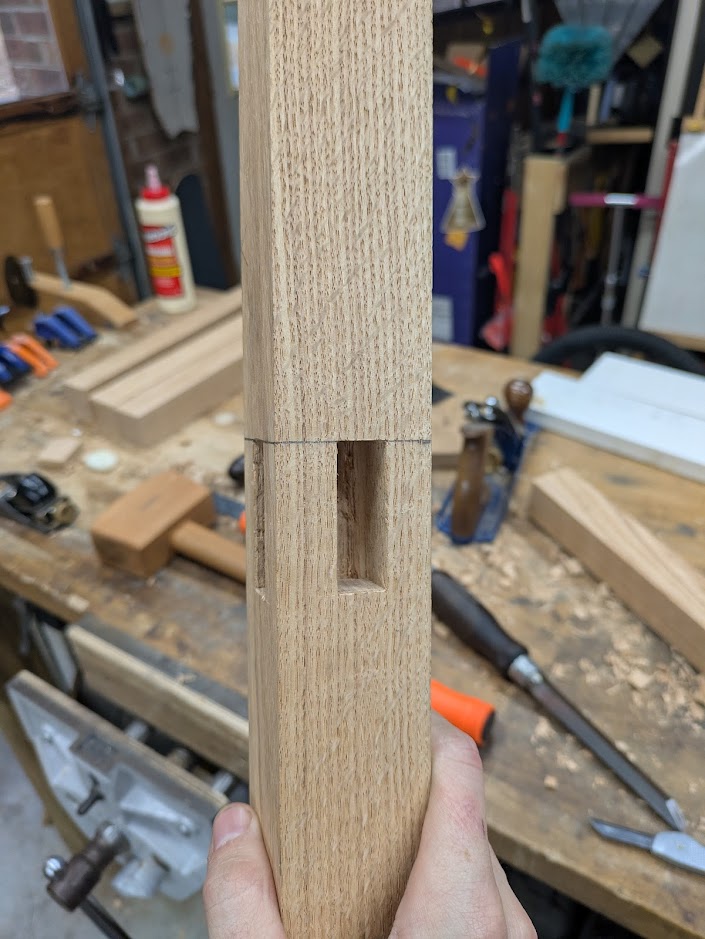
Next up was chopping the mortises for the lower legs. There were much more difficult because there was no access from the top so I couldn’t saw into the piece as a shortcut. You can see how being a little loose with the dimensioning step started to creep into the project. The mortise on the left was significantly taller than the one on the right. In the end, you won’t really notice.
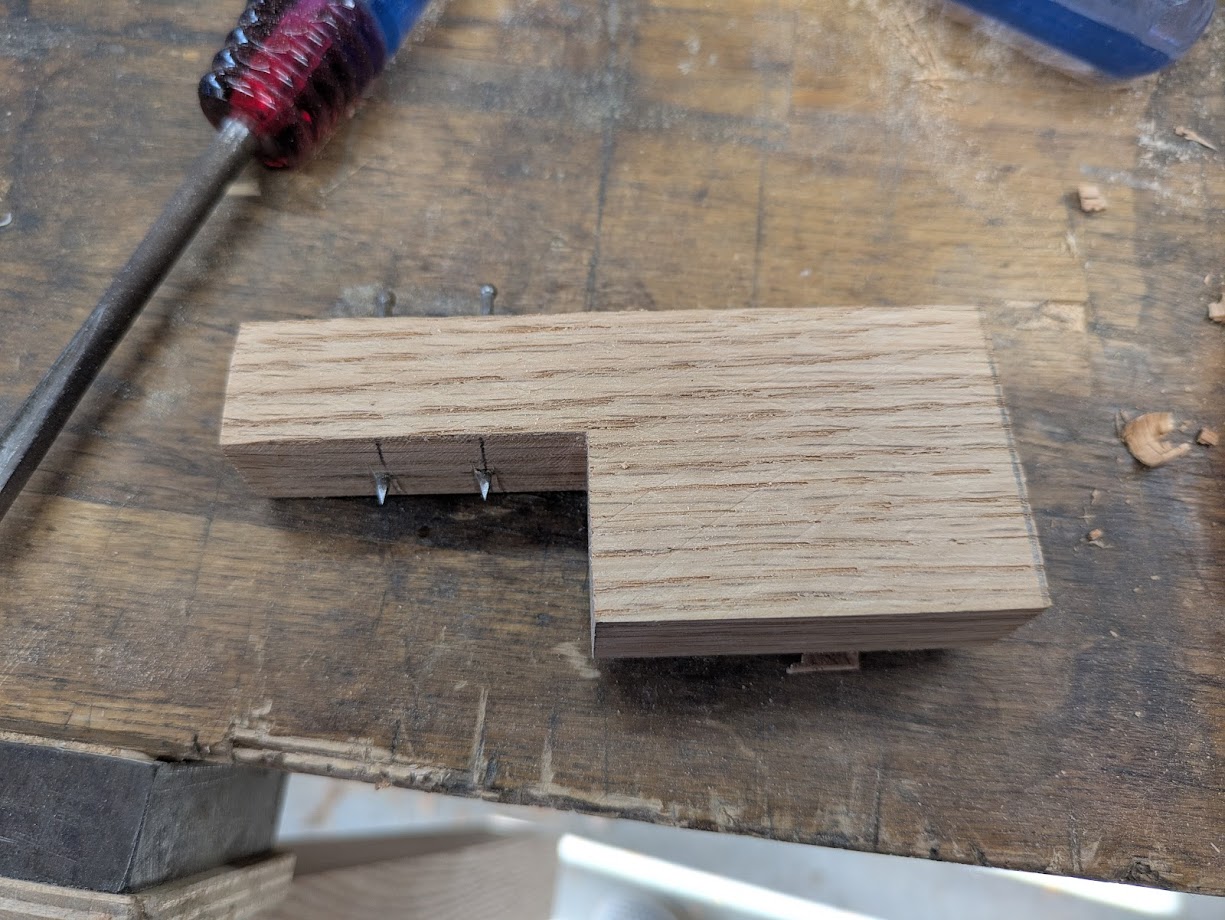
Cutting the tenons for the lower legs went pretty much as well as the top. I was particularly proud of this one. Look at that beautiful joint! No gaps… on this one. Until I glued it. But whatever. It looked great in this photo so enjoy!
Throughout the project I did a number of test fits. I don’t know how valuable they were from a process standpoint, but it sure was fun sticking the pieces together and envisioning what the final product would look like.
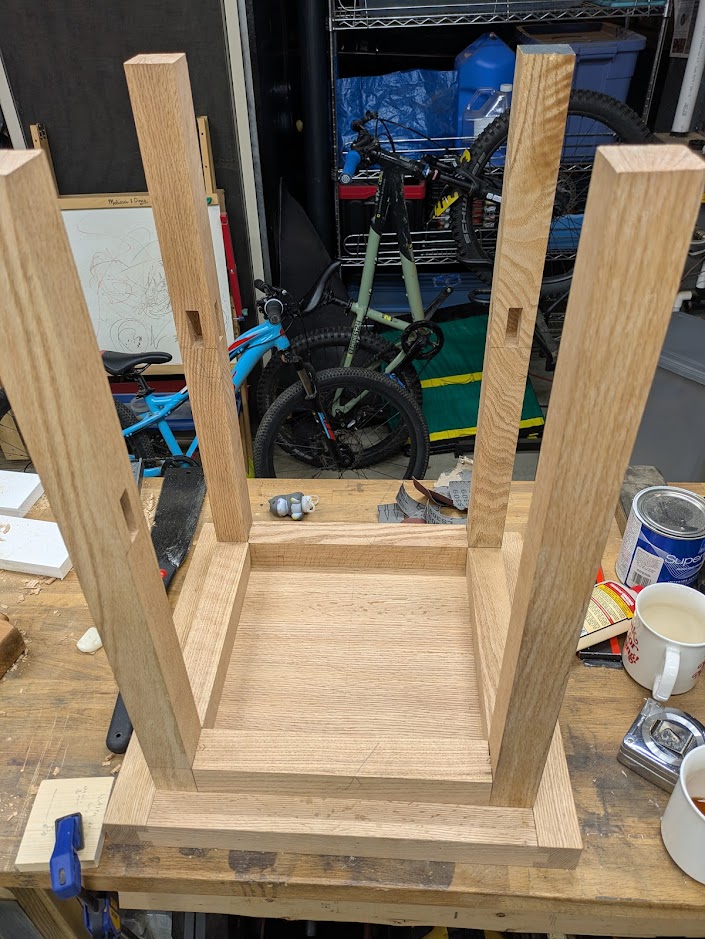
Things started looking really good once the lowers were fully cut and fit. I was regularly checking for square and making sure no twist was creeping in. Adjusting was a simple matter of shaving down the tenons on one side or the other to allow for the work piece to settle into a parallel configuration.
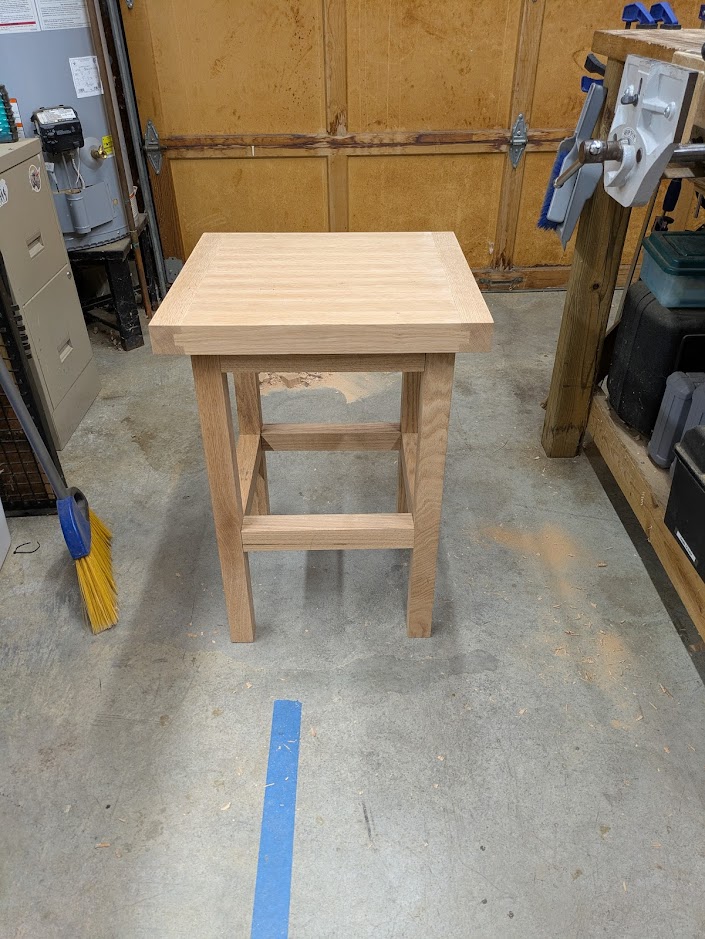
Once all the main joinery was finished, I mocked up the table with the top and legs all together. At this point I was starting to feel like the table was going to be successful. Even without the glue, you could sit on the table and it wouldn’t wrack back and forth. In the next part, I’ll be cutting the dovetails for the shelf slats and putting on the finishing touches.