The Problem
The problem started when my wife gave me a 3D printer for my birthday. I could not contain my excitement. I may be 20 years behind the curve on getting one, but I’d say the technology is really mature at this point and the price is right. For just under $300 you can get a very capable printer and more filament than you will know what to do with (although I’m finding I might burn through this pretty fast anyway). However, there was a big problem: I had nowhere to put it.
Of course, you can’t just slap a 3D printer down on a coffee table with wheels, held stable with dumbbells and powered by extension cords from the garage. Well, you can, and I did, but that’s not exactly the best idea. For one thing, my Creality Ender 3 v3 SE is what’s called a “bed slinger”, which means it throws the bed back and forth for the Y-axis movement, which creates a good deal of force. You clearly need something much more stable. Also, my dogs’ tails were a hazard to any print. And of course my coffee table is right next to the basement door so any time someone went in/out, a nice cool draft would breeze by and curl the corners of whatever I was printing. No bueno.
So, I decided it was time for another side project. This time a super sturdy table for the printer, with some shelf space below it to store parts and tools. As much as I love high tech tools and gadgets, some of my hobbies are strictly analog. When I need a break from screens and keyboards, I really don’t want to have yet more screens and bluetooth pairing problems. All of my tools are hand operated, with the notable exception of my drill and impact driver. I’m a masochist, but even I have limits.
This project began with basically two measurements, width and length. I just needed a table top wide enough for the printer to sit. None of my wood working projects start with actual plans and measurements. I have plenty of time to mull things over while I’m dimensioning boards so there’s not much need for pre-planning except maybe a high level idea of what the end result should look like. This table was no exception. In fact, by the time I had the idea to even take pictures and write this blog post, I had already dimensioned most of the top of the table and was half way through making the breaboard ends.
Starting with the top
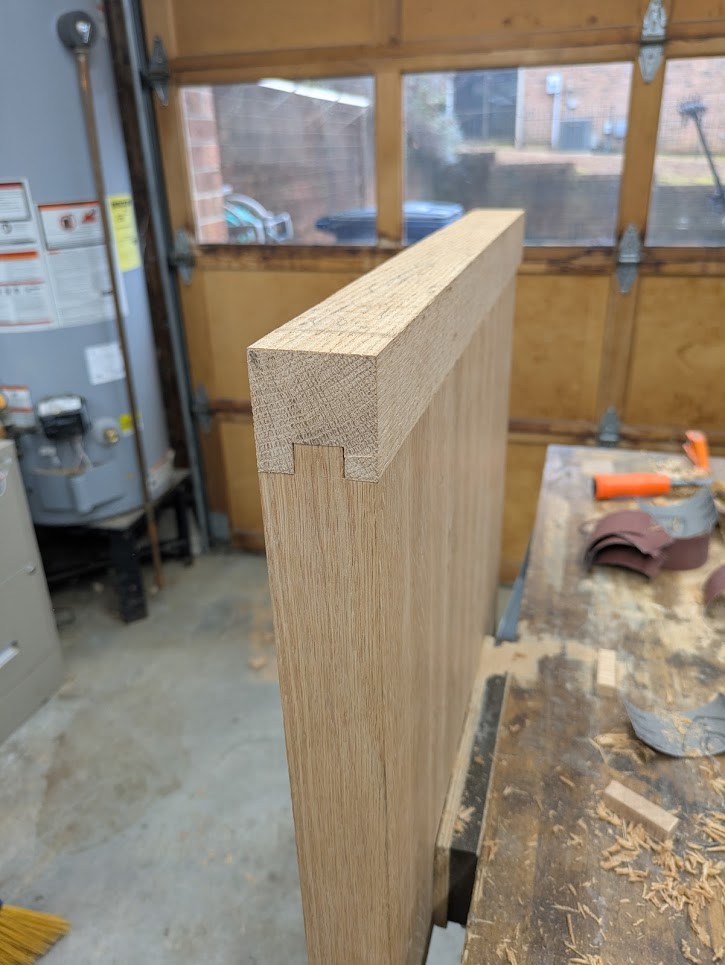
If you’re not familiar, a breadboard end is the little sideways piece of wood at the end of a table, named after a breadboard or cutting board which often will also have the same feature. They’re a nice aesthetic addition to a table, but they’re also functional. Because of the way wood changes over time due to moisture content, a plain table top can develop a bow, cupping, or twist over time, especially in laminated pieces like the one I’m making for this table. One solution would be to use quarter sawn lumber. This would be my first choice if it wasn’t for the fact that it’s absurdly expensive and I already had a big stack of oak just laying around waiting for a project. The other option is to use a breadboard end. This end cap prevents the warping behavior by aligning the grain perpendicularly; warping of the table is resisted by the two pieces of wood on each end holding them in alignment. The downside is that force has to go somewhere and if you’ve glued up the breadboard ends too tight, it will eventually break the glue joint.
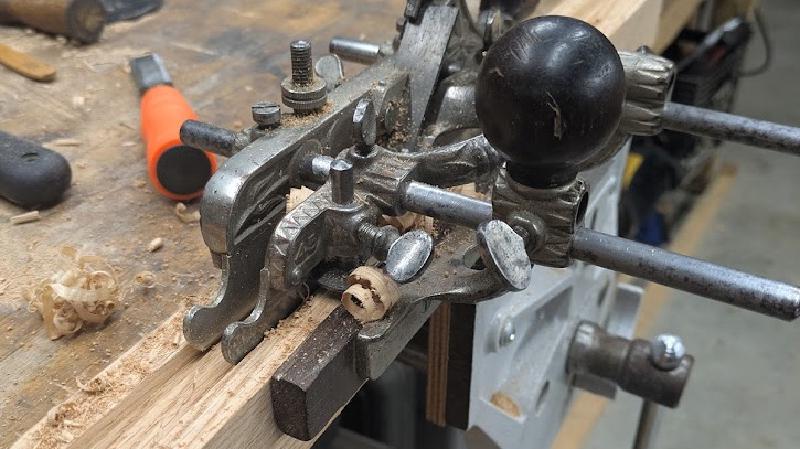
Anyway, we’ll worry about that in the summer time. For now, we need to cut a long groove in a piece of oak. Enter the Stanley 45 hand plane. Easily the most complicated, weird tool I have in my workshop.
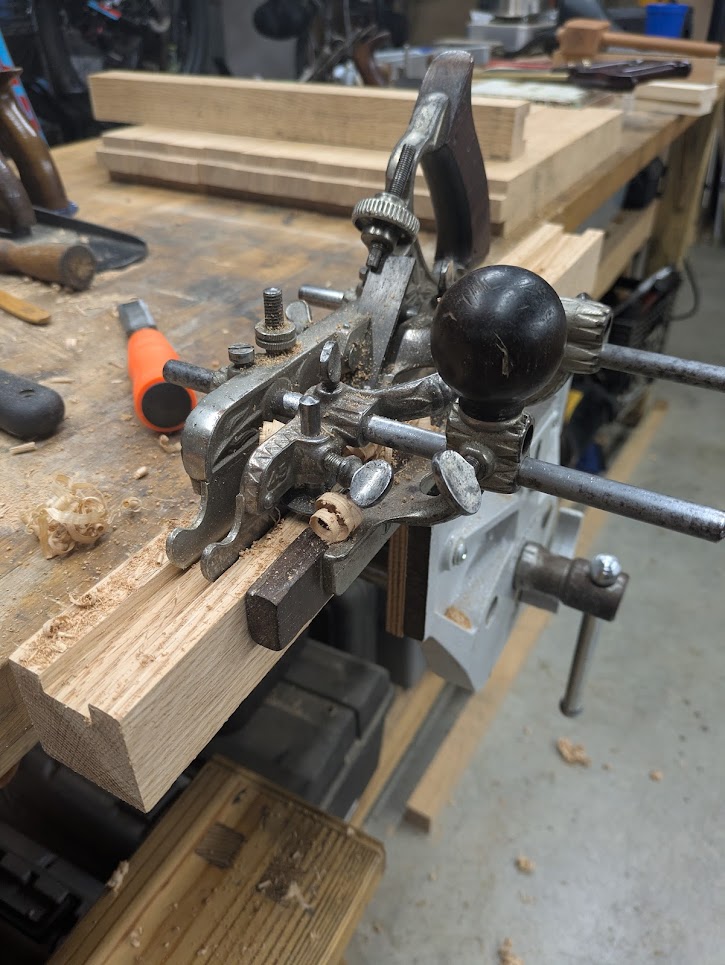
This was my first actual use case for this plane, which as you can see has all kinds of knobs and adjustments to fiddle with. This was a rather simple case of setting a depth stop and using the fence to keep the plane from wandering. The most difficult part of this entire job was keeping the bottom of the groove flat and level. For this reason, I stayed just a little shy of my actual desired depth and finished planing without the fence so I could bring it as close to level as possible. I didn’t have to be super careful about making sure it was level all the way across. Just at the ends since you’ll see a gap if they don’t line up.
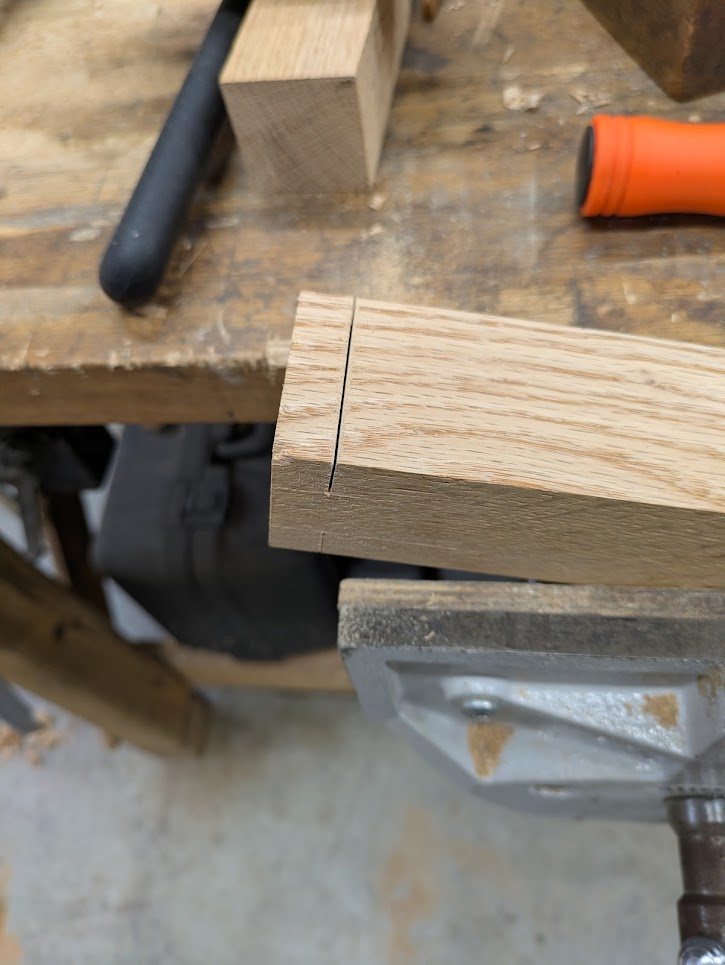
With hand tool woodworking, you can make very precise joints, but you must be willing to sacrifice precision of measurement or you’ll go crazy trying to get things exact. What I mean is, at least at my level, there’s almost no point in trying to make a groove that’s precisely 1.125" wide. No matter how hard you try, it’s going to vary somewhat across the length of the board. To that end, I almost never measure anything except the large scale dimensions. As long as your joints are the same relative size, it would be impossible for someone to notice the tiny variations in actual size. So don’t bother. Instead, cut the groove first since it’s harder to get a precise cut, then cut the tongues for the table top to fit.
For this piece, the most important part is making sure the breadboard end and the top of the table are tightly fitted, so I use a Paul Sellers technique called a “knife wall” to make sure my saw cut leaves a nice crisp line across the top of the board.
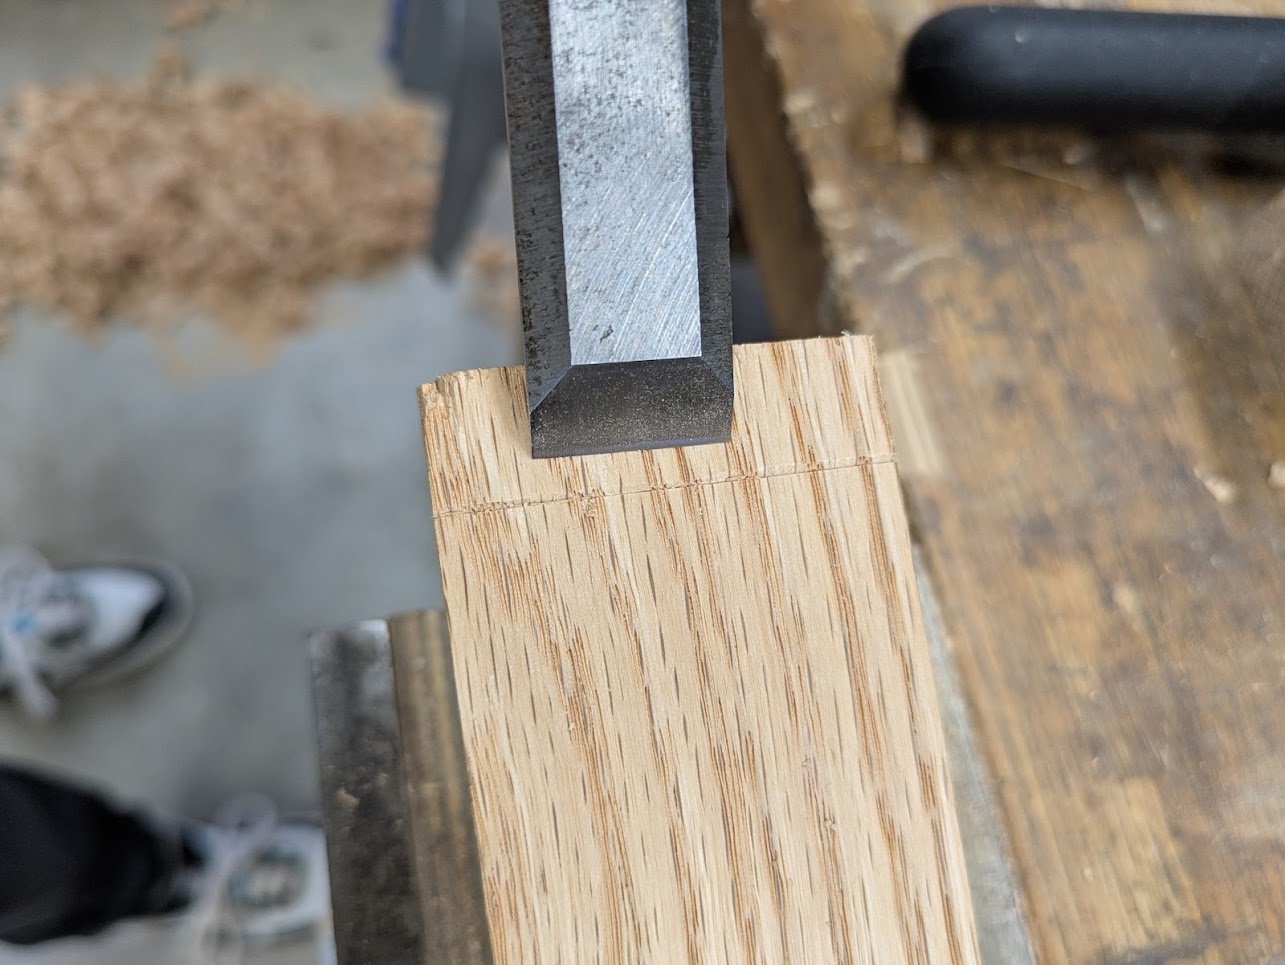
By slicing across the grain, then cutting a small notch for my saw, it’s really hard to make a bad cut. When cutting freehand, it’s difficult to get a perfectly square cut. You can see in the image below I’m a little under 90 degrees, but that’s OK. I always try to err on the side of needing to clean up the shoulders later. This may take a little extra work, but you don’t want to miss the mark the other way or you’ll end up with a piece that’s too short and you’ll have to cut the rest to match.
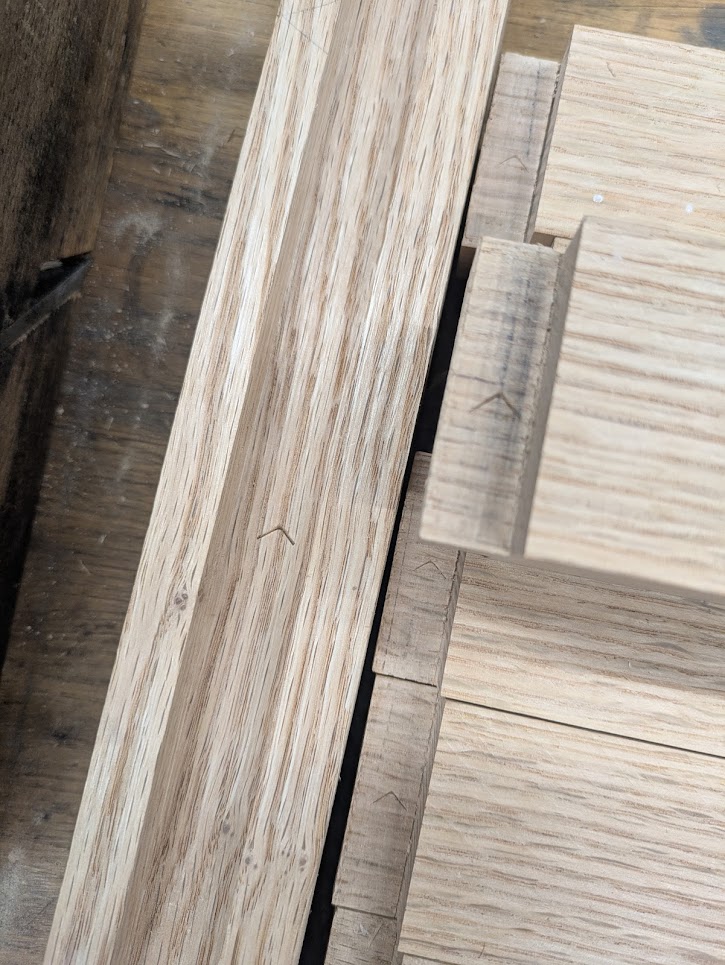
Since each piece is cut to fit, you need to be very careful about your layout. I have a cheap, horrible set of gouges that are about as useful as a grapefruit spoon for their stated purpose, however I have repurposed them to mark pieces unambiguously for assembly later. Because they’re actual physical cuts, I don’t have to worry about the marks rubbing off when I’m working with the material. I actually like these marks being visible on the finished work piece because it clearly illustrates the hand made nature of the furniture. These “witness” marks are often left behind on antique furniture if you know where and what to look for.
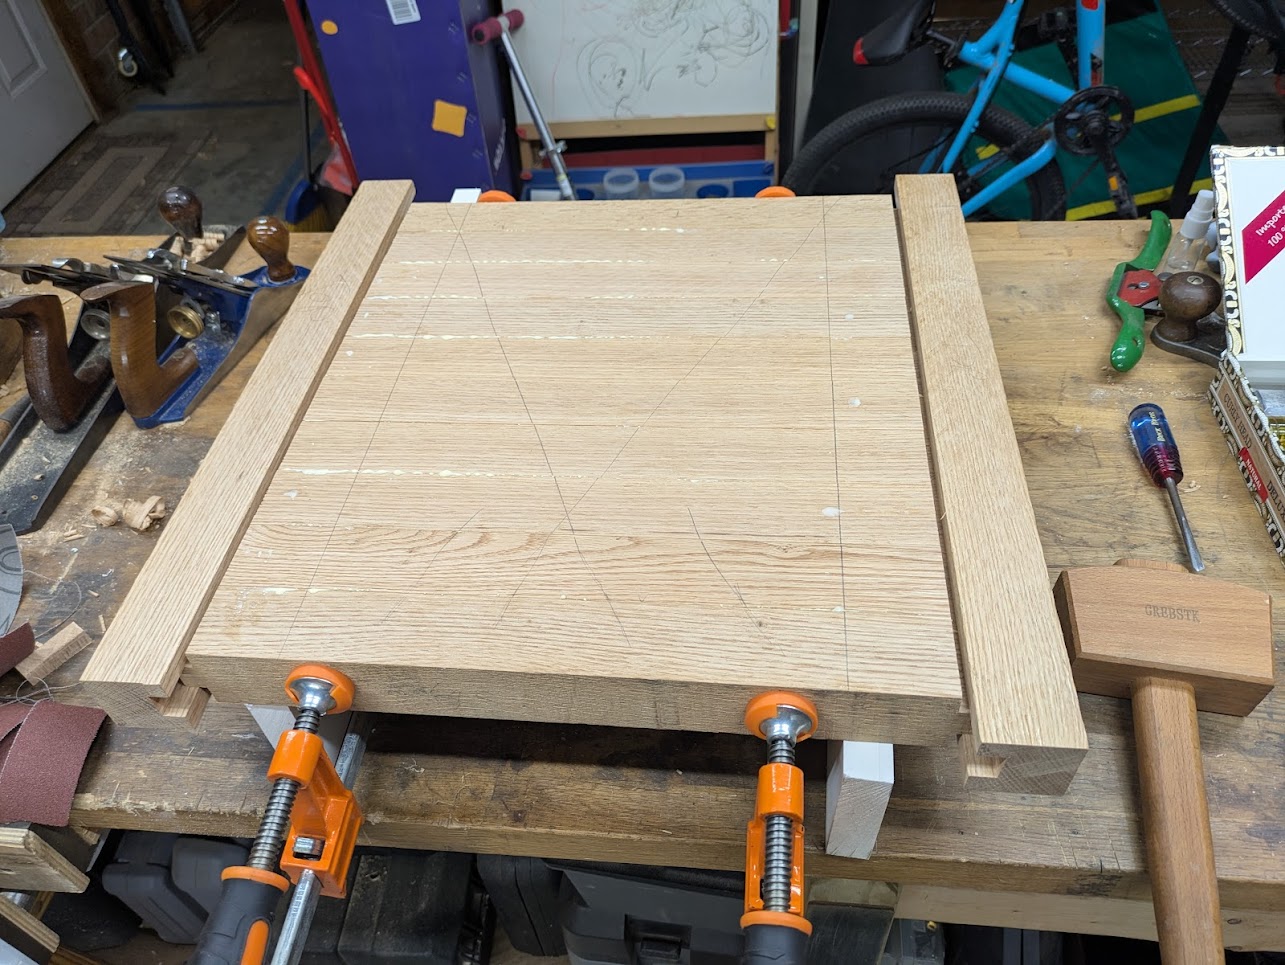
The glue up
Once everything has been cut to length and lined up as well as possible, it’s time to glue up the table top. Pro tip: to keep these pieces from sliding around when clamping, as they tend to do once you put a boat load of glue on them, you can scrape some pieces of sandpaper together and let the little bits of grit land in the wet glue before you clamp them together. The extra grit prevents the pieces from sliding around and won’t compromise the strength of the joint. Thanks to this guy for that little tidbit. Just don’t forget to put the breadboard ends on as a guide so all the boards are all aligned correctly! Ask me how I know.
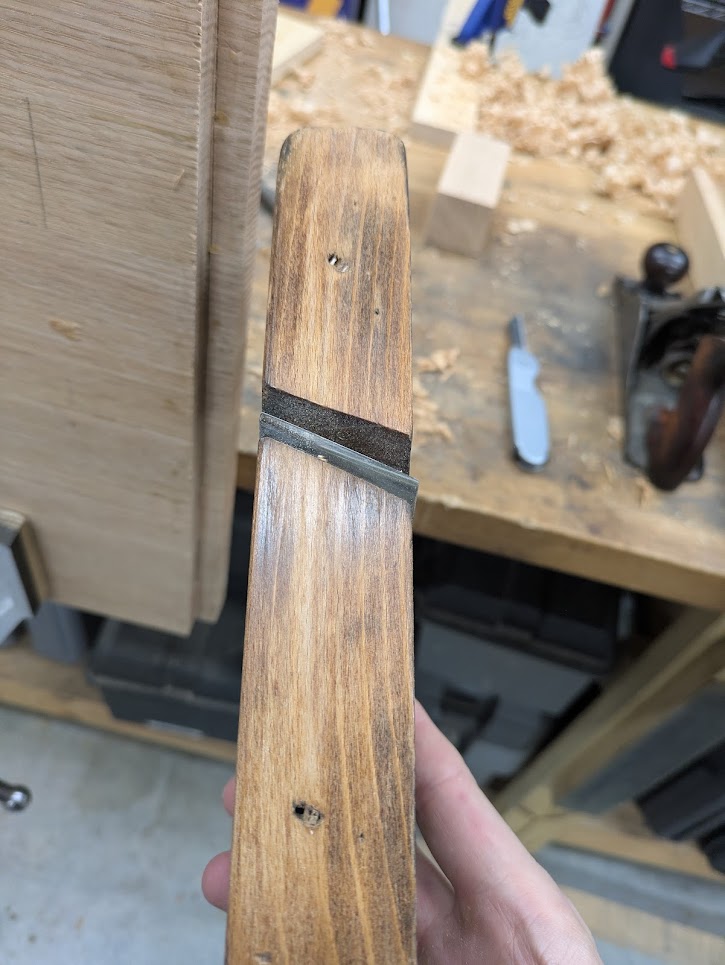
After the glue dries, it’s time to start the final fitting of the breadboard ends. I cut the tongues extra long so this step would be a breeze. Here you can see I have about 1/8" to go, but my jack plane will make quick work of this end grain. As long as you plane from the ends into the middle, you don’t have to worry about splitting. I only really cared that the two end pieces were squared and had no gaps. The middle pieces will be covered by the breadboard ends so I was a bit ham fisted about removing material there. Hooray for hidden features no one will ever see.

Once the tongue lengths are all good, the last step before final glue up is to hit the shoulders with one of these skew angle bois. This thing is a pain in the ass to use for anything except cleaning up shoulders. But for that, it’s great. My shoulders were all very close to lined up from the glue up so there wasn’t much to do here except trim the outliers. The skew angle iron on this thing was crucial to doing this without making a mess of it. Just make sure to plane from the right end of the board so the skewed iron pulls the plane into the cut.
After the glue dries, the last step is to cut off the excess and plane it all smooth. I’m pretty happy with how tight the gaps are on this piece. It’s not perfect, but it will do.
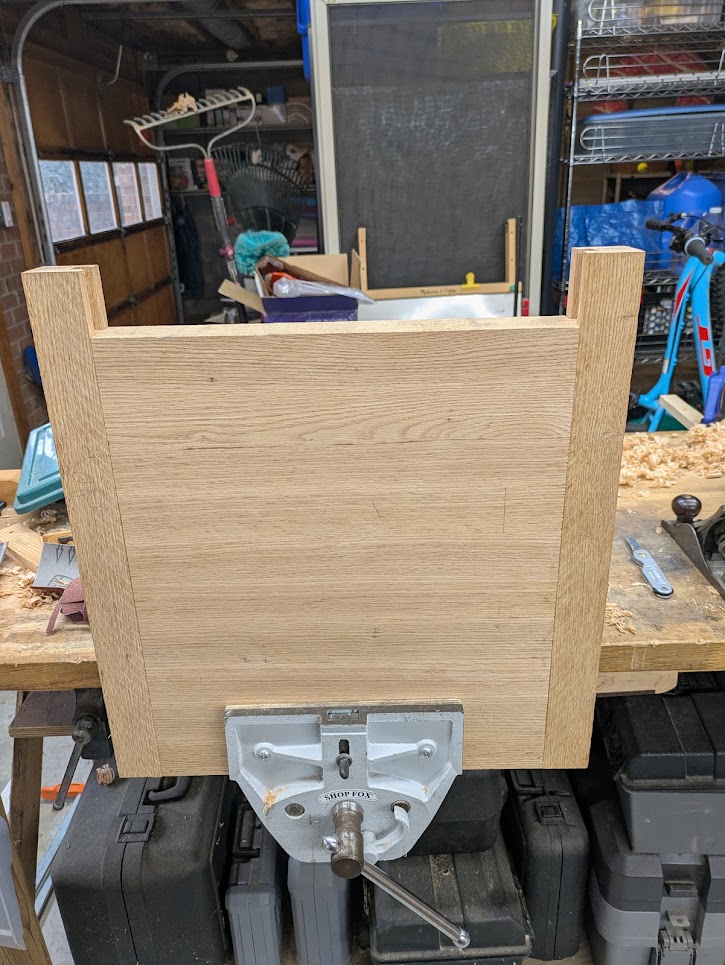
After the shoulder work with the skew plane and a little trimming with a chisel, the tongue and groove joint fits very well. I’m quite pleased with this result.
In part 2 we’ll start working on the frame of the table. I chose to use blind mortise and tennon joints for this project because they’re easier to get right. Of course I couldn’t make things too easy for myself, so I compromised by doing dovetails for the shelf slats.