TL;DR
Buy all this crap, print those two files, stick it all together with some screws and use your favorite GoPro mounting accessories to become an elite haxxor in just a few short steps.
Buy this stuff
- Raspberry Pi 3 B v1.2 (or better)
- MakerHawk Raspberry Pi UPS Power Supply
- Literally any 18650 battery (x2) compatible with the above UPS
- Hosyond 3.5 Inch 480x320 Touch Screen TFT LCD SPI Display Panel
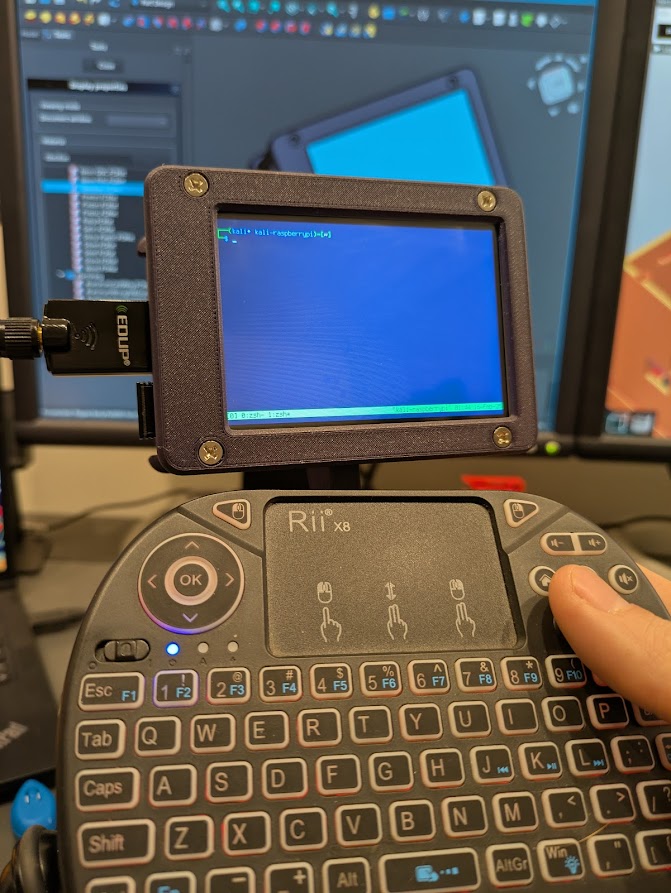
- Rii X8 Mini Keyboard or whatever you want to use, I don’t care. I’m not your boss.
- A USB wireless adapter compatable with monitor mode like this one
Print/modify/download this stuff
- STL file for the case and the screen bezel
- FreeCAD file if you want to modify my terrible design files. Don’t shame me. I am not an engineer.
What is a cyberdeck?
I do not like the name “cyberdeck”. I especially don’t like it after a certain electric vehicle inspired by a child’s pinewood derby car was launched because being even tangentially associated with walking prolapsed anus, Elon Musk, makes me physically ill. I feel it’s my duty to remind you that cyberpunk, the genre lending its name to all matter of cyber-stuff (including that hideous hulking low-poly anti-pedestrian “truck”), was intended as a warning. It’s been romanticized in popular fiction, but the origin of the cyber genre is very dark. The dystopian futures envisioned by authors of this subgenre of science fiction are especially appropriate today when we’re facing many of the realities presented in these fictional near-future settings. The rise of AI, rampant climate impacts from end stage capitalism, the consolidation of power into the hands of the hyper-wealthy, and the constantly accelerating pace of technology causing real harm to our daily lives.

In the before times, before the Trump regime that is, I probably would have let off the gas on my political opinion and just let things be, but fuck it. The MAGA crowd seems to have no trouble speaking their minds, even when it’s homophobic, transphobic, racist, misogynistic, xenophobic, antisemitic bullshit (and it is all bullshit, all the time), and taking the high road sure as shit didn’t work so instead it’s pedal to the metal baby. Full gas hot takes all the way. If this makes you uncomfortable, or you disagree with my opinion, you can alt-f4 right the fuck off my page. I do not give a shit about your stupid opinion (and it it stupid, trust me). This is my blog and you can go complain about it on the site formerly known as Twitter or TrUtH sOcIaL where all the other Nazi sympathizers, and crypto-bros, and Andrew Tate incel cucks hang out.
Now, where were we?
A cyberdeck, unlike a Cybertruck, is actually worth talking about, at least in my humble opinion. The term comes from a book from the ’80s called Neuromancer by William Gibson, but in common use now it describes a portable computer built by a hacker. Hacker culture is a nuanced subject on its own, and it’s safe to say there are many different opinions on who is/isn’t a hacker and what it means to be a hacker. I think of a hacker as a person who is not satisfied simply using a device or piece of software, but must find out how it works, either by creating something new with it or breaking it in unique and interesting ways. Richard Stallman has a similar take on the term involving chopsticks and weird ways you can use them that violate the original intended use. The reason or motive is really irrelevant which I think is where the common use of the word hacker becomes contentious. I hack entirely to find out if I can, not to profit or exploit for personal gain, but the word has become synonymous with “bad guys trying to steal your identity”.
Alright, enough setup. Let’s talk about the project.
Why build one?
Don’t you have a laptop? Isn’t that, you know, easier to use, more powerful, less finicky, and generally better? Yep, it sure is. None of those are incorrect statements. I’ll refer you to the first section of this post where I said hackers want to find out how things work by creating or breaking things? This is both! Not only am I creating my own portable computer (which is fun on its own), but I also am installing Kali Linux on it so I can get up to all kinds of mischief after its been built. I call this a “win-win”. I imagine my actual use of this device will be pretty limited, but that’s not the point. I want to create something. I don’t want to follow a guide. I don’t want to download the print files and buy a list of components and assemble something. I want to take my vision and turn it into a physical, functional object using the tools I have at my disposal.
The build
Starting with what I have
If you’ve worked in any kind of electrical engineering, computer science related field long enough, you probably are well aware of the mountains of tech cruft that tends to build up in every corner of your home. Instead of cobwebs, I have routers, serial cables, LPT cables, graphics cards, wireless modules, and a wide assortment of broken or half functional e-garbage cluttering up my living space. Come to think of it, I also have cobwebs on some of this equipment.
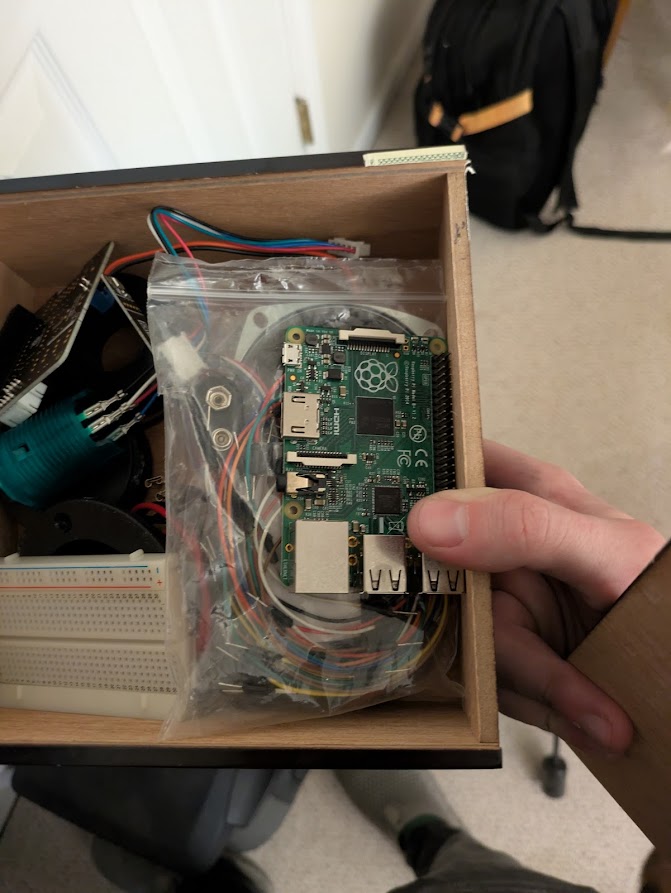
So it will probably come as no surprise to find out that I had half the stuff I needed for this build before I even conceived of the idea. The base computer is a Raspberry Pi 3 B v1.2. I had one of these in my tech junk drawer.
I also needed a keyboard, but I had plenty of those so the real question was which one? I settled on a portable wireless model because… it’s portable. And wireless.

If you want to do any spelunking on wifi networks with Kali, you also need a compatible wireless adapter. My main inspiration for starting this project was the limitations of the ESP32 wifi dev board you can get for your Flipper. While it would be neat to have these capabilities on my Flipper, I would be limited to the 2.4Ghz band, which leaves half of the wireless spectrum completely inaccessible. That wouldn’t do, so I grabbed this little USB dongle from my, you guessed it, tech junk drawer.
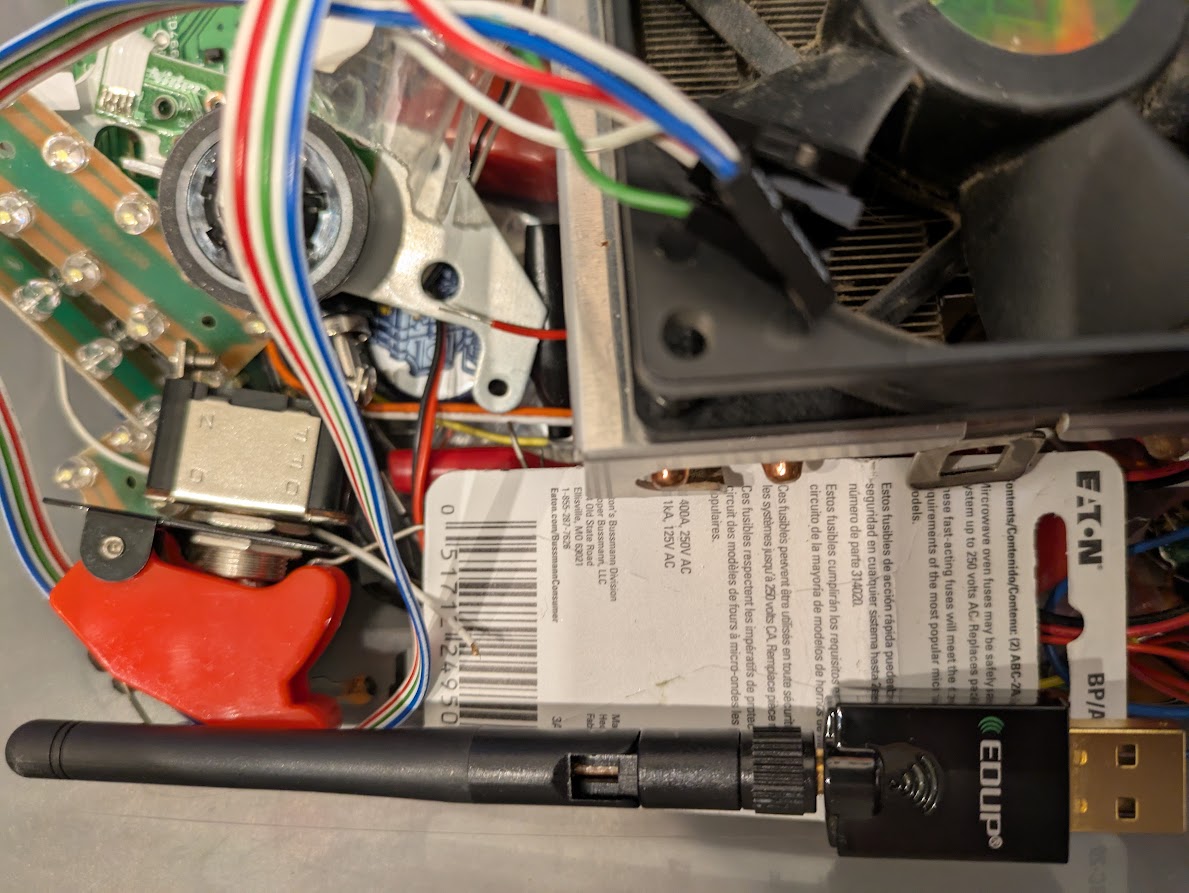
I also had an older Alfa wireless adapter with a high gain omni antenna and a flat panel directional that I could scavenge for a little extra range. Score! But that’s not enough for a cyberdeck build, so it was off to Amazon for some high quality garbage components.
Dirt cheap and barely functional Amazon add-ons
For the low low price of $30 I was able to get a MakerHawk RPi UPS, which is literally just a battery pack that connects to the GPIO header on the RPi with a couple spring loaded pins, a.k.a. pogo pins, from under the board. I also needed a screen that was low profile and connected directly to the board. The last thing I wanted was an external monitor, or to have to manage an HDMI cable in my build somewhere. This is supposed to be small and portable after all. I found this top end Hosyond 3.5" 480x320 TFT display for $17 that consumes most of the GPIO headers and has at least a couple hundred pixels. Perfect. I also ordered some batteries, but shortly after I remembered that giant pile of tech garbage (you know the one) and of course I saved some old laptop batteries for reasons that before today were unclear. My hoarding has finally been justified, and will therefore continue in perpetuity.

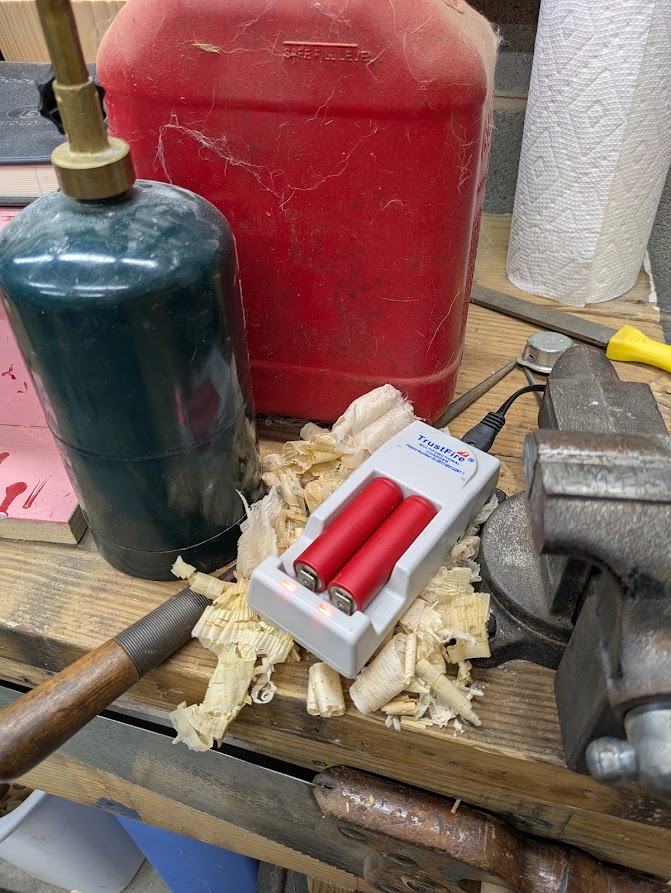
You see, that’s because I’ve recently discovered that many larger devices all use the same battery package: 18650 lithium ion cells. These things are great. They’re rechargeable, put out between 3.7v and 4.2v, and they are in so many different things: from cordless drills to laptops to Ring camera battery packs (probably, I didn’t break it open to see but the size strongly suggests that’s what’s inside). So, out came the pliers and after cutting my finger open and bleeding all over myself, I ended up with a hefty pile of fire starters for all of my future project needs.
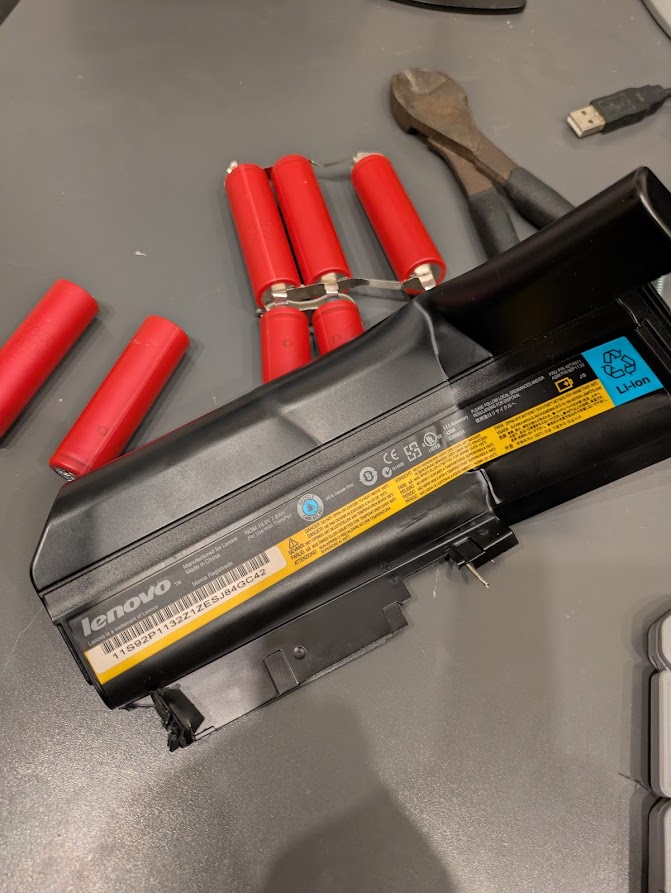
The red color indicates danger. Probably don’t do this. I was going to say “if you don’t know what you’re doing”, but I think just don’t is the best advice. However, I enjoy the adrenaline rush of leaving these babies on the charger and going to sleep wondering if they’ll spontaneously release their tremendous energy in a fiery explosion of molten lithium and caustic electrolytes, so I won’t be following the very good advice I just gave you.
The case will be easy, right?
So all of the components have arrived and been stacked on top of each other. I fought a cadre of annoying bugs, getting bluetooth working (add dtoverlay=minuart-bt to /boot/config.txt), figuring out why the hell the 8211AU driver needed to be compiled from source if you want to actually use monitor mode, casting CLI spells to get the display to orient the right way for my use case (dtoverlay=tft35a:rotate=270, same place), and probably another dozen things I’ve forgotten at this point. Oh, right, trying and failing to get mouse input on a TTY. So now that the device functions, I need a case. The aesthetics of bare circuit boards don’t really bother me, and I’d be fine with that, except all of these parts are delicate and I plan on using this thing outside of my house occasionally so it’s time to put the 3D printer to work.
Design failures
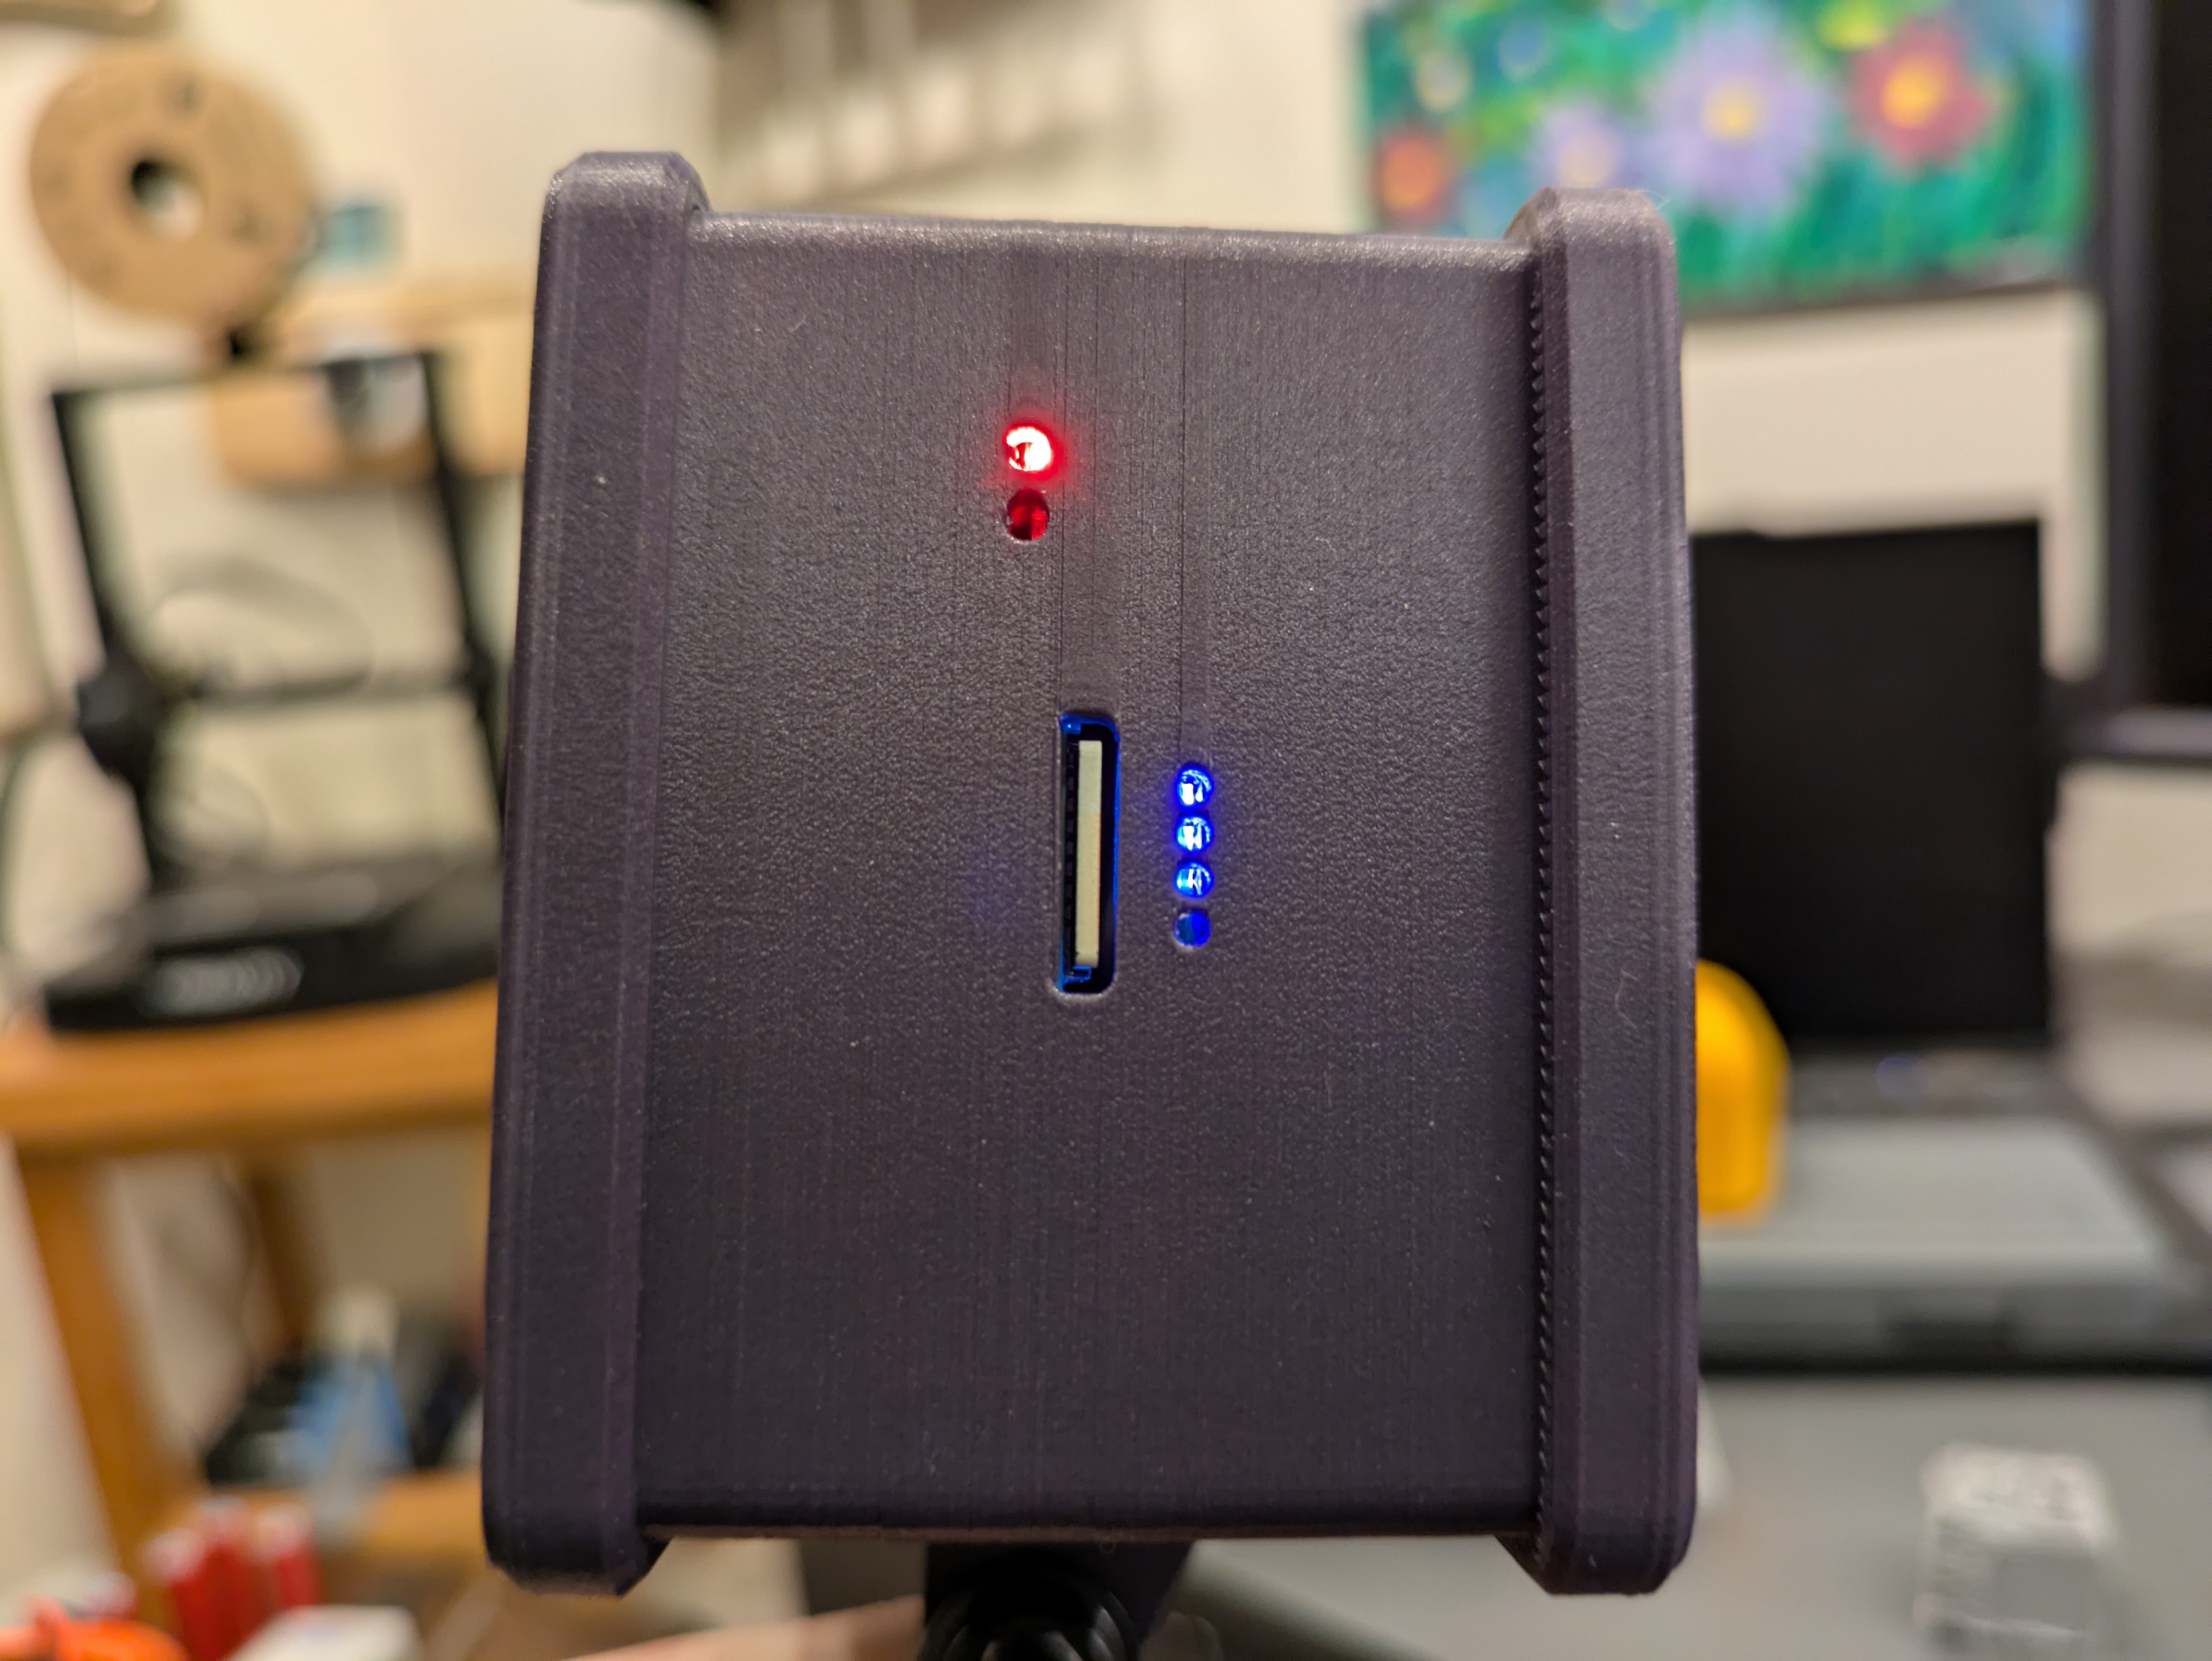
And so the fun began. I’m no stranger to CAD software. I’ve dabbled a little in many of the open source tools for quite some time now, but until I got the 3D printer, it was mostly just me trying to see if I could do it. The reality of CAD is much more frustrating. For one thing, it’s pretty easy to make simple stuff like hooks and mounting brackets, it’s an entirely new thing altogether to make a case around a piece of complex geometry with many, many important dimensions to consider. For example, the RPi has a micro-USB charging port, 4 regular USB-A ports, an RJ-45 port, two LED indicators, a bank of GPIO pins, an SD card slot, and a headphone jack. THEN you have to consider the UPS unit has its own micro-USB charging port, two regular USB-A charging ports (for external devices), and a USB-C charging port. Oh and 4 indicator lights. AND THEN AFTER THAT, you have to consider the TFT screen which, well, yeah that one was pretty much just a rectangle. But still!
My first attempt was essentially just a hollow box with a lid. And this, probably, maybe, would have worked with some finagling, but it had a lot of drawbacks. For one thing, the TFT screen is smaller than the profile of the rest of the devices, so how do you support it? Also, the power button on the UPS unit (I forgot to mention that one, yeah, it has a power button and it sticks wayyyy the hell out) needs to have clearance when installing it. And then there was the problem of the cutouts for ports. How do you locate those things? Measure in from the edge? Keep a spreadsheet with all the dimensions? I can say from experience the spreadsheet definitely didn’t work.
Iteration 2 was still the same box, but this time with some extra room poked for clearance, but still no clear idea how to do the cutouts. I made a lid with a little lip that would hook onto the screen, but it couldn’t be printed reasonably in any orientation so I had to add supports. This sucks. If you’re designing something to be printed, if at all possible, find any other solution than using supports.
I kept scratching my head and wasn’t making much progress. My biggest problem was visualizing how all the pieces and parts would go together. I kept losing track of where ports would be, or the physical realities of how it would all be assembled. What to do?
Finally, an idea that works
Eventually I landed on the solution: get CAD models for all the parts and use them for reference. I’m sure all the seasoned engineers and CAD gurus are saying “duh, obviously” right about now, but I’m about as unseasoned as the chicken at a Live, Laugh, Love cooking convention, so give me a break. Up until this project, I had no need to model things I wasn’t planning on printing. But this project has a lot more going on that made it impossible to build without it.
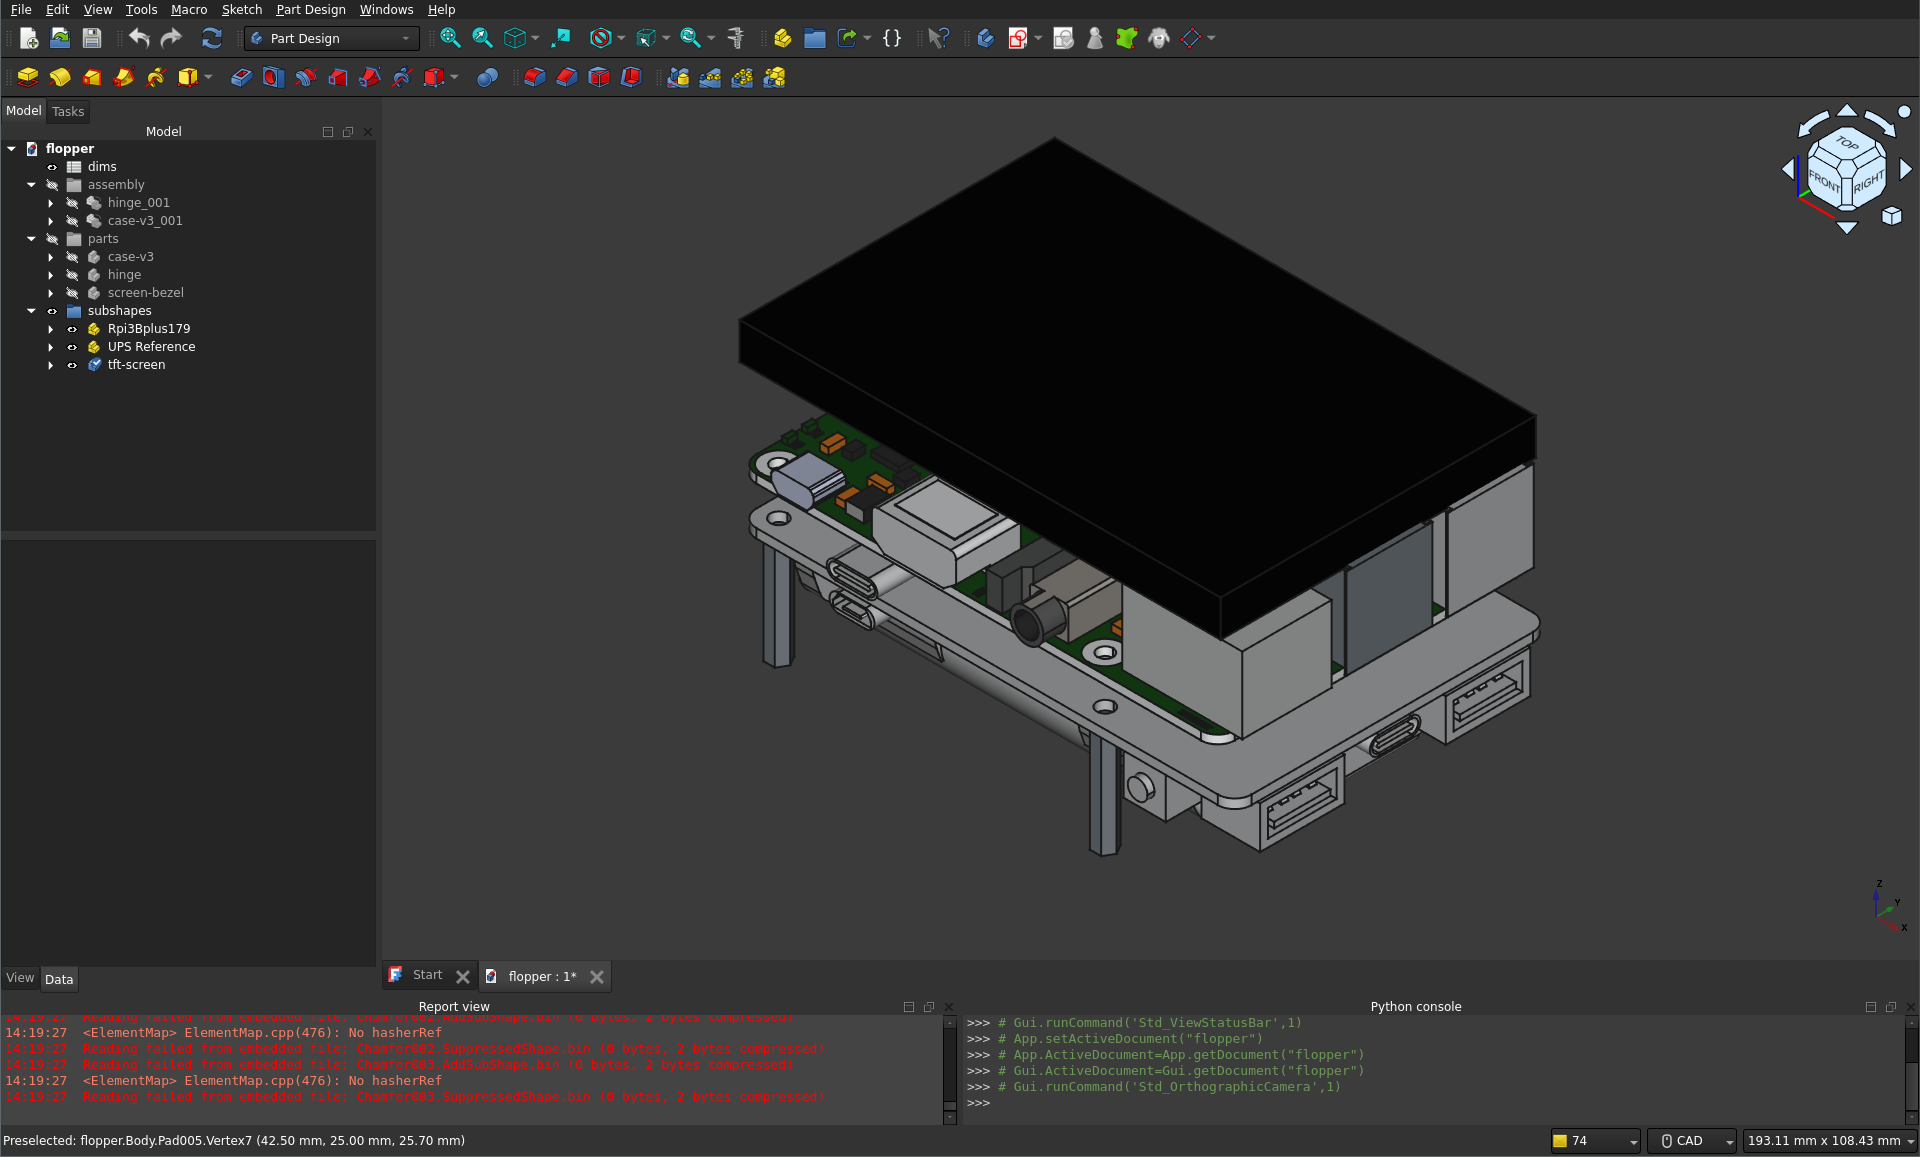
So now that I have all the pieces and parts slapped together the way they will be in my case, the rest was, well, not that easy, but easier once I had a good set of reference geometry to build on. It turns out the power button location on my model, as well as the charging port location was off by a few millimeters so I needed to make some adjustments to my offsets to get that to work. I started by printing the lower half of the case just to make sure everything aligned, then made adjustments and did a larger print. I didn’t want to waste my filament, so printing small sections at a time to see if they would work was the best way to get the result I was looking for. But then I ran into the same snag from before. How to support the display?
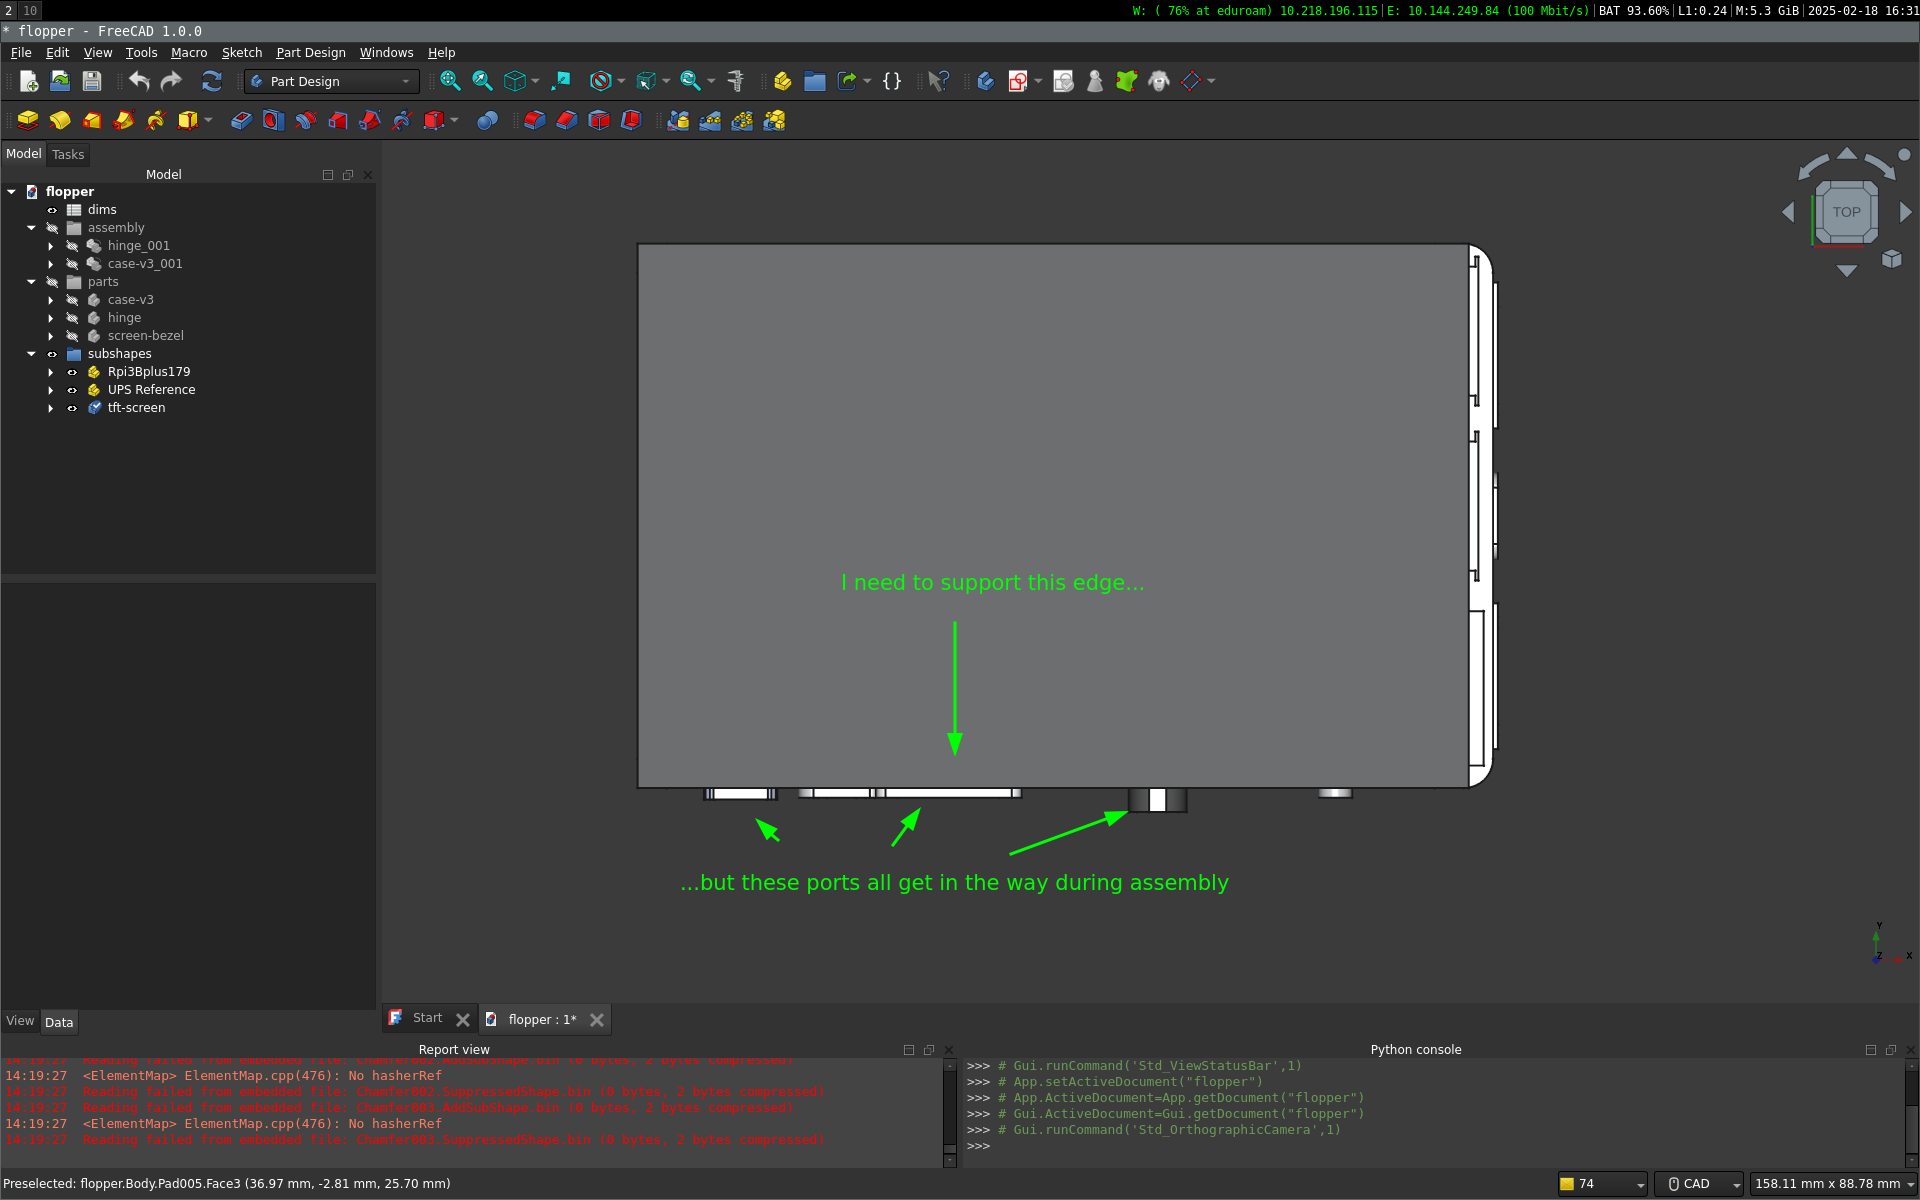
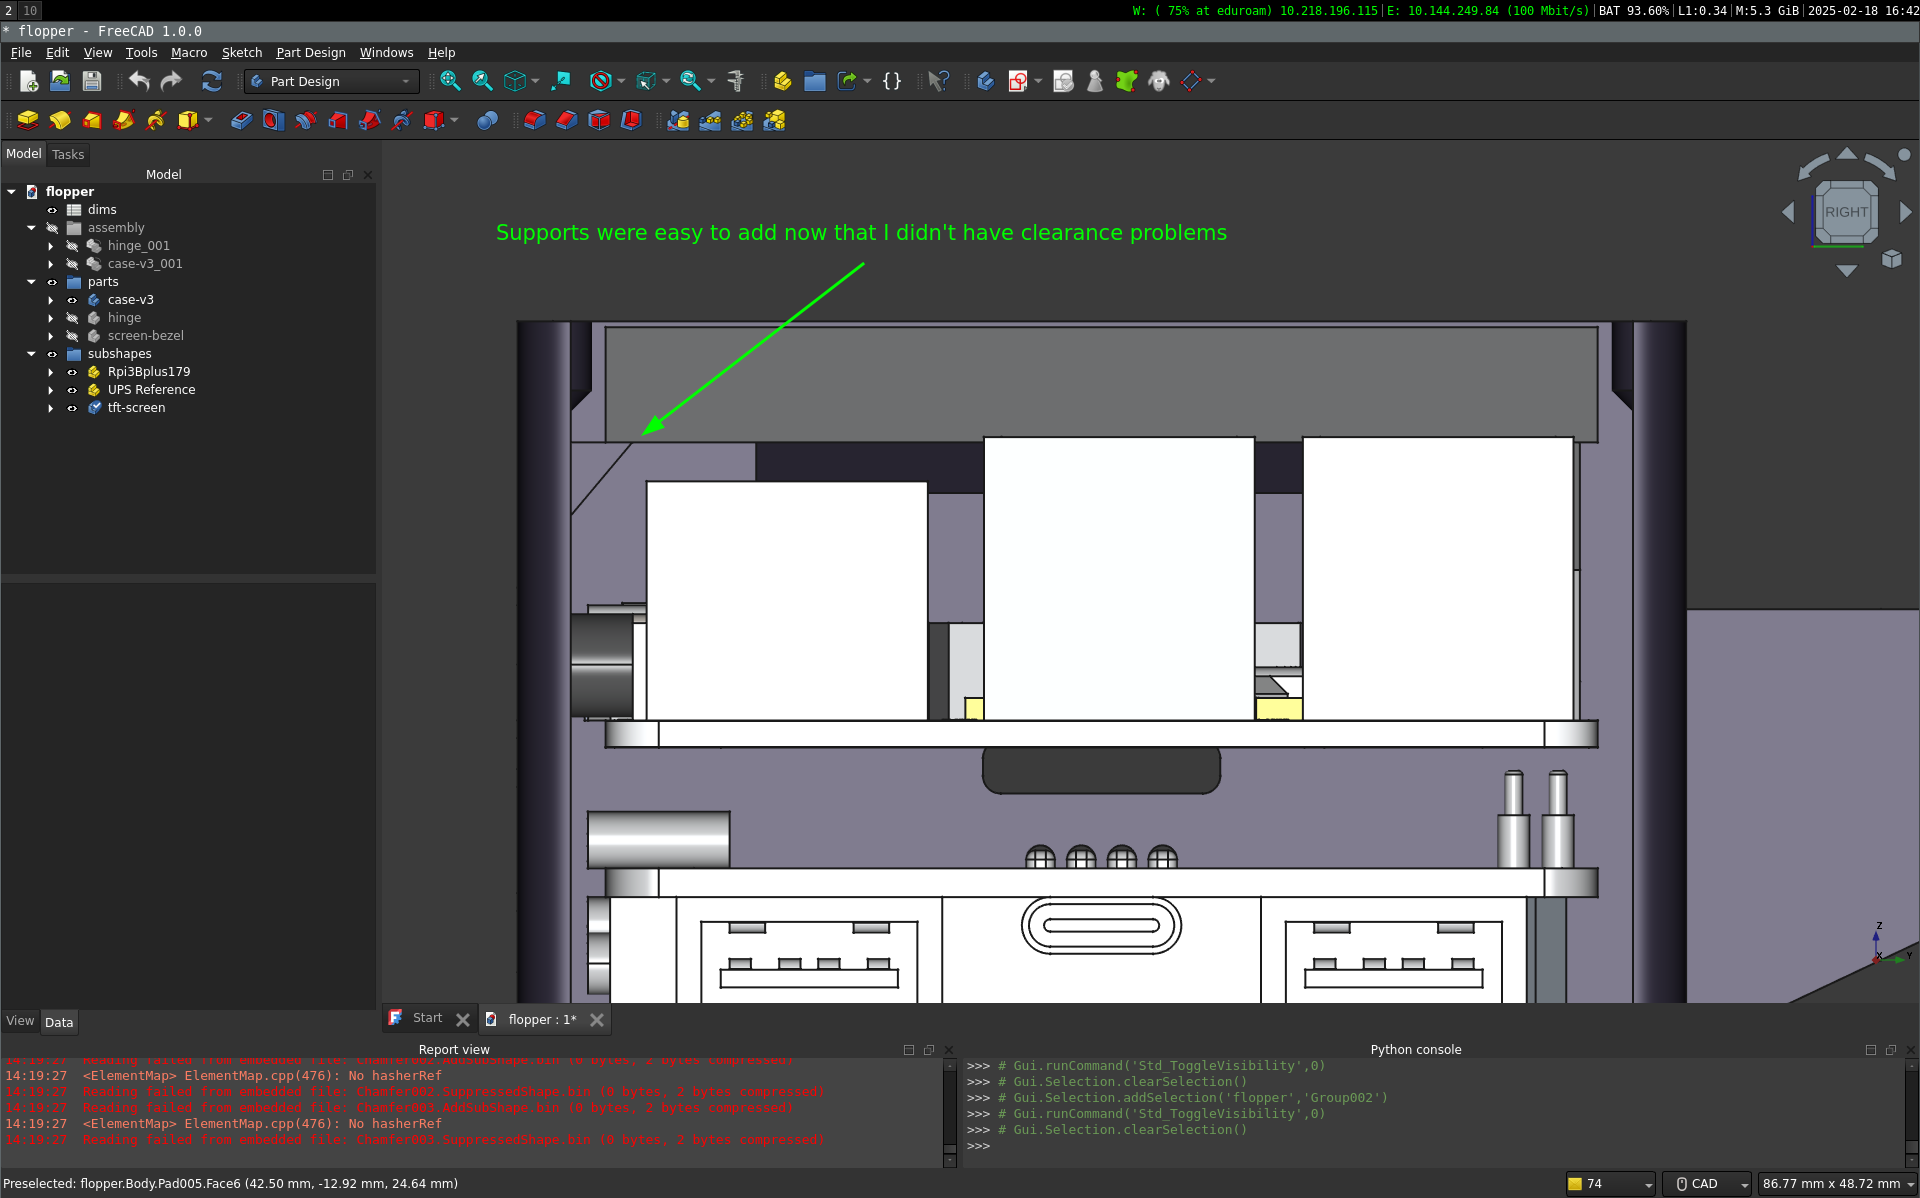
Then I had it! A stroke of genius isn’t the right turn of phrase, so let’s go with “above average inspiration”. Since I started 3D printing, I’ve wanted to try making some print in place mechanisms and this was the perfect opportunity. Rather than fit the guts in from above, I could instead add a hinge to the fat end of my contraption. This would solve two glaring issues with my design. First, the whole assembly problem would be solved immediately because I could add robust supports for the screen.
Print in place hinges are actually pretty simple to make as it turns out, assuming your printer is properly tuned. The only gotcha is 3D printers can’t do overhangs without support. So while it is possible to bridge across thin air, you have to be supported on both sides of the bridge or the filament will sag. With clearances of 0.2mm like in my hinge design, you’ll just end up fusing the parts together. So what’s the solution? Conical hinge pins. 3D printers can’t easily print overhangs at 90 degrees, but can quite happily print 45 degree overhangs without issue. So rather than making cylindrical hinge pins, you just make them conical.
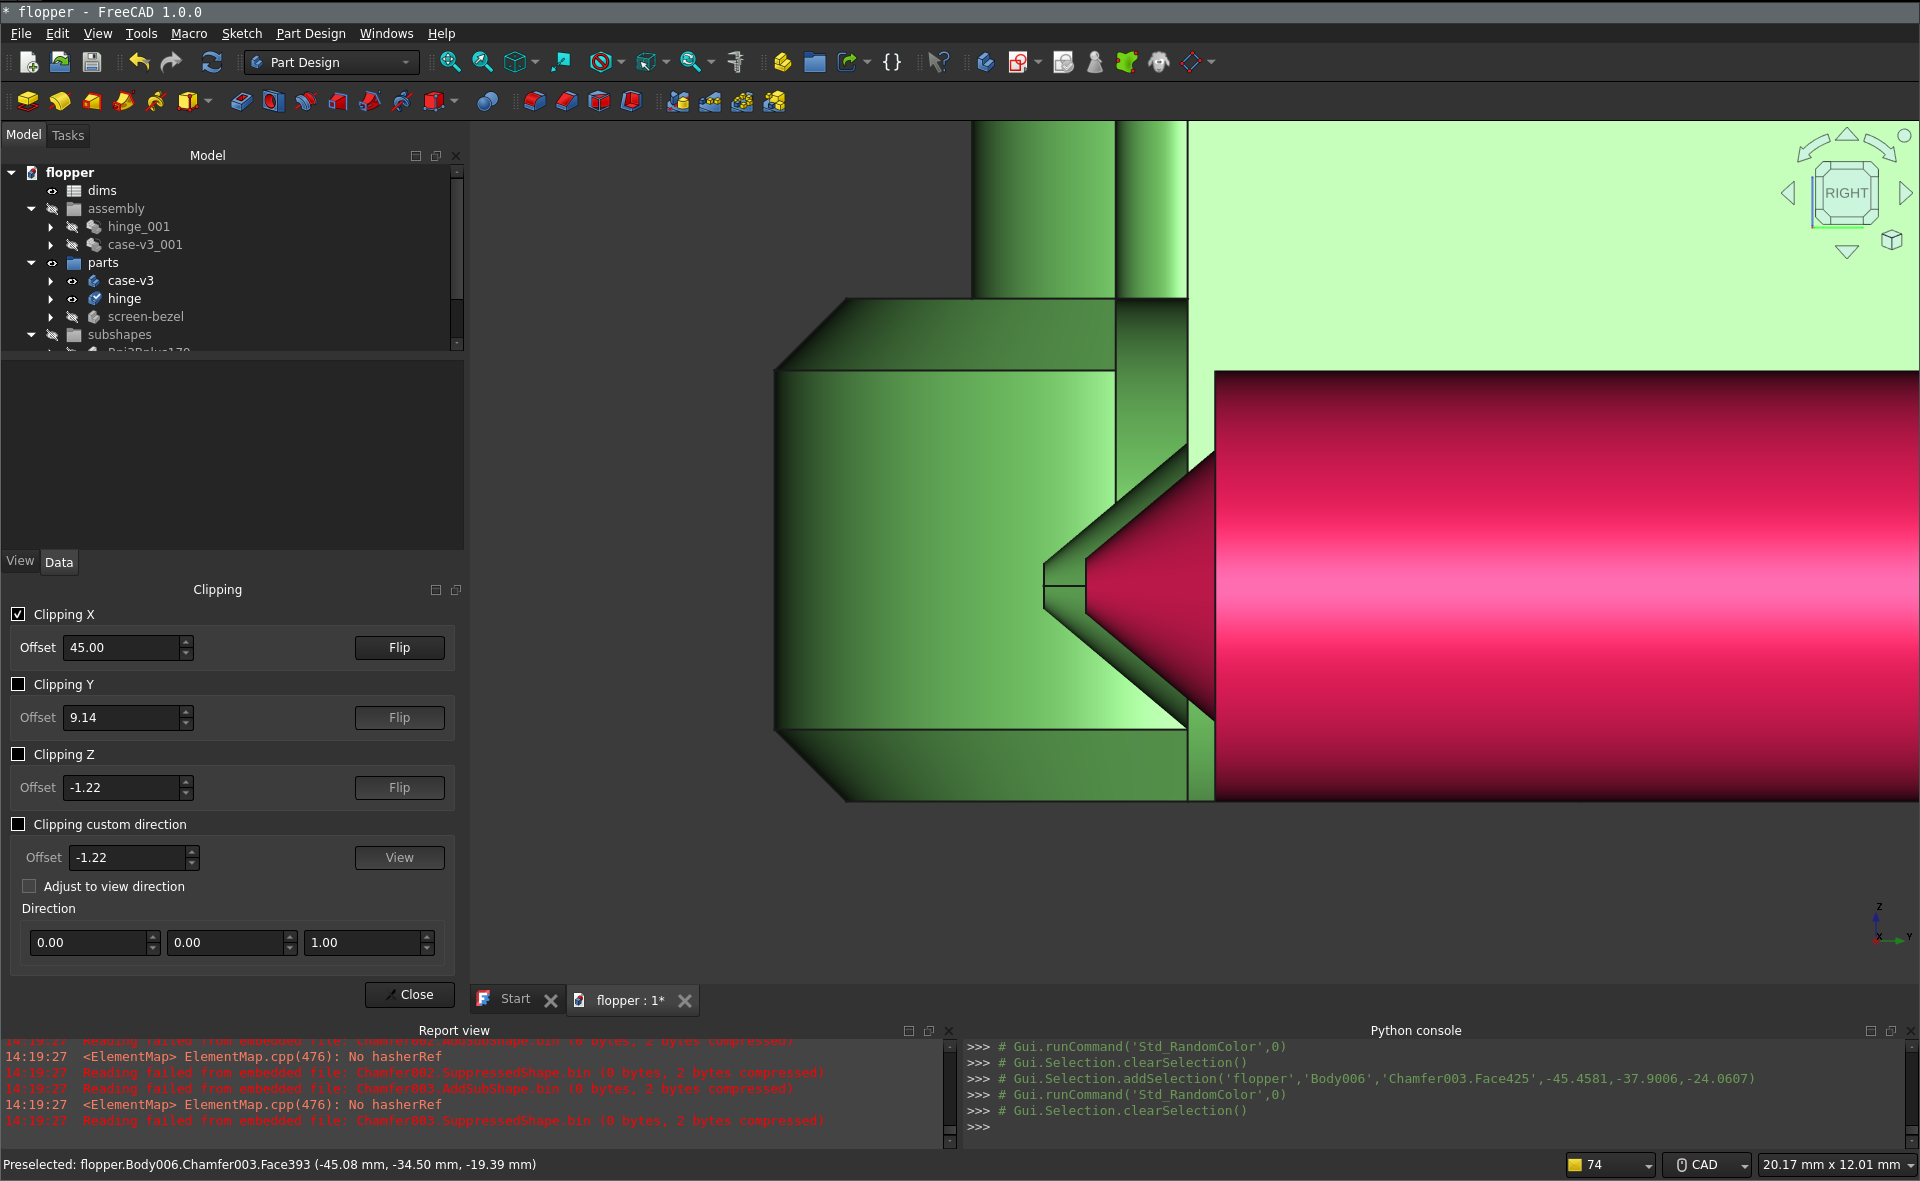
So off to the printer I went. Most slicers conveniently allow you to cut a project with an arbitrary plane. This is good for tall models you intend to glue together later, or in this case, cutting most of the box apart so I could verify my design works. I did a test print and to my surprise, the hinge worked exactly as designed, first try. At this point the only thing left was to figure out how to mount the case to various surfaces. Sometimes I would want to use it while sitting on the couch, maybe other times I would want to be able to go wardriving, or maybe I wanted to connect a keyboard to it. Rather than reinvent the wheel, I used the ubiquitous GoPro mounting system. This design is dead simple to model, and can easily be used with all the accessories I already have for filming my mountain biking. As I’m writing this, I just realized I have a mounting point on all my helmets, which means I can ride my bike and collect wireless data at the same time. Fantastic. Is warbiking a thing? It should be. New plan for this weekend.
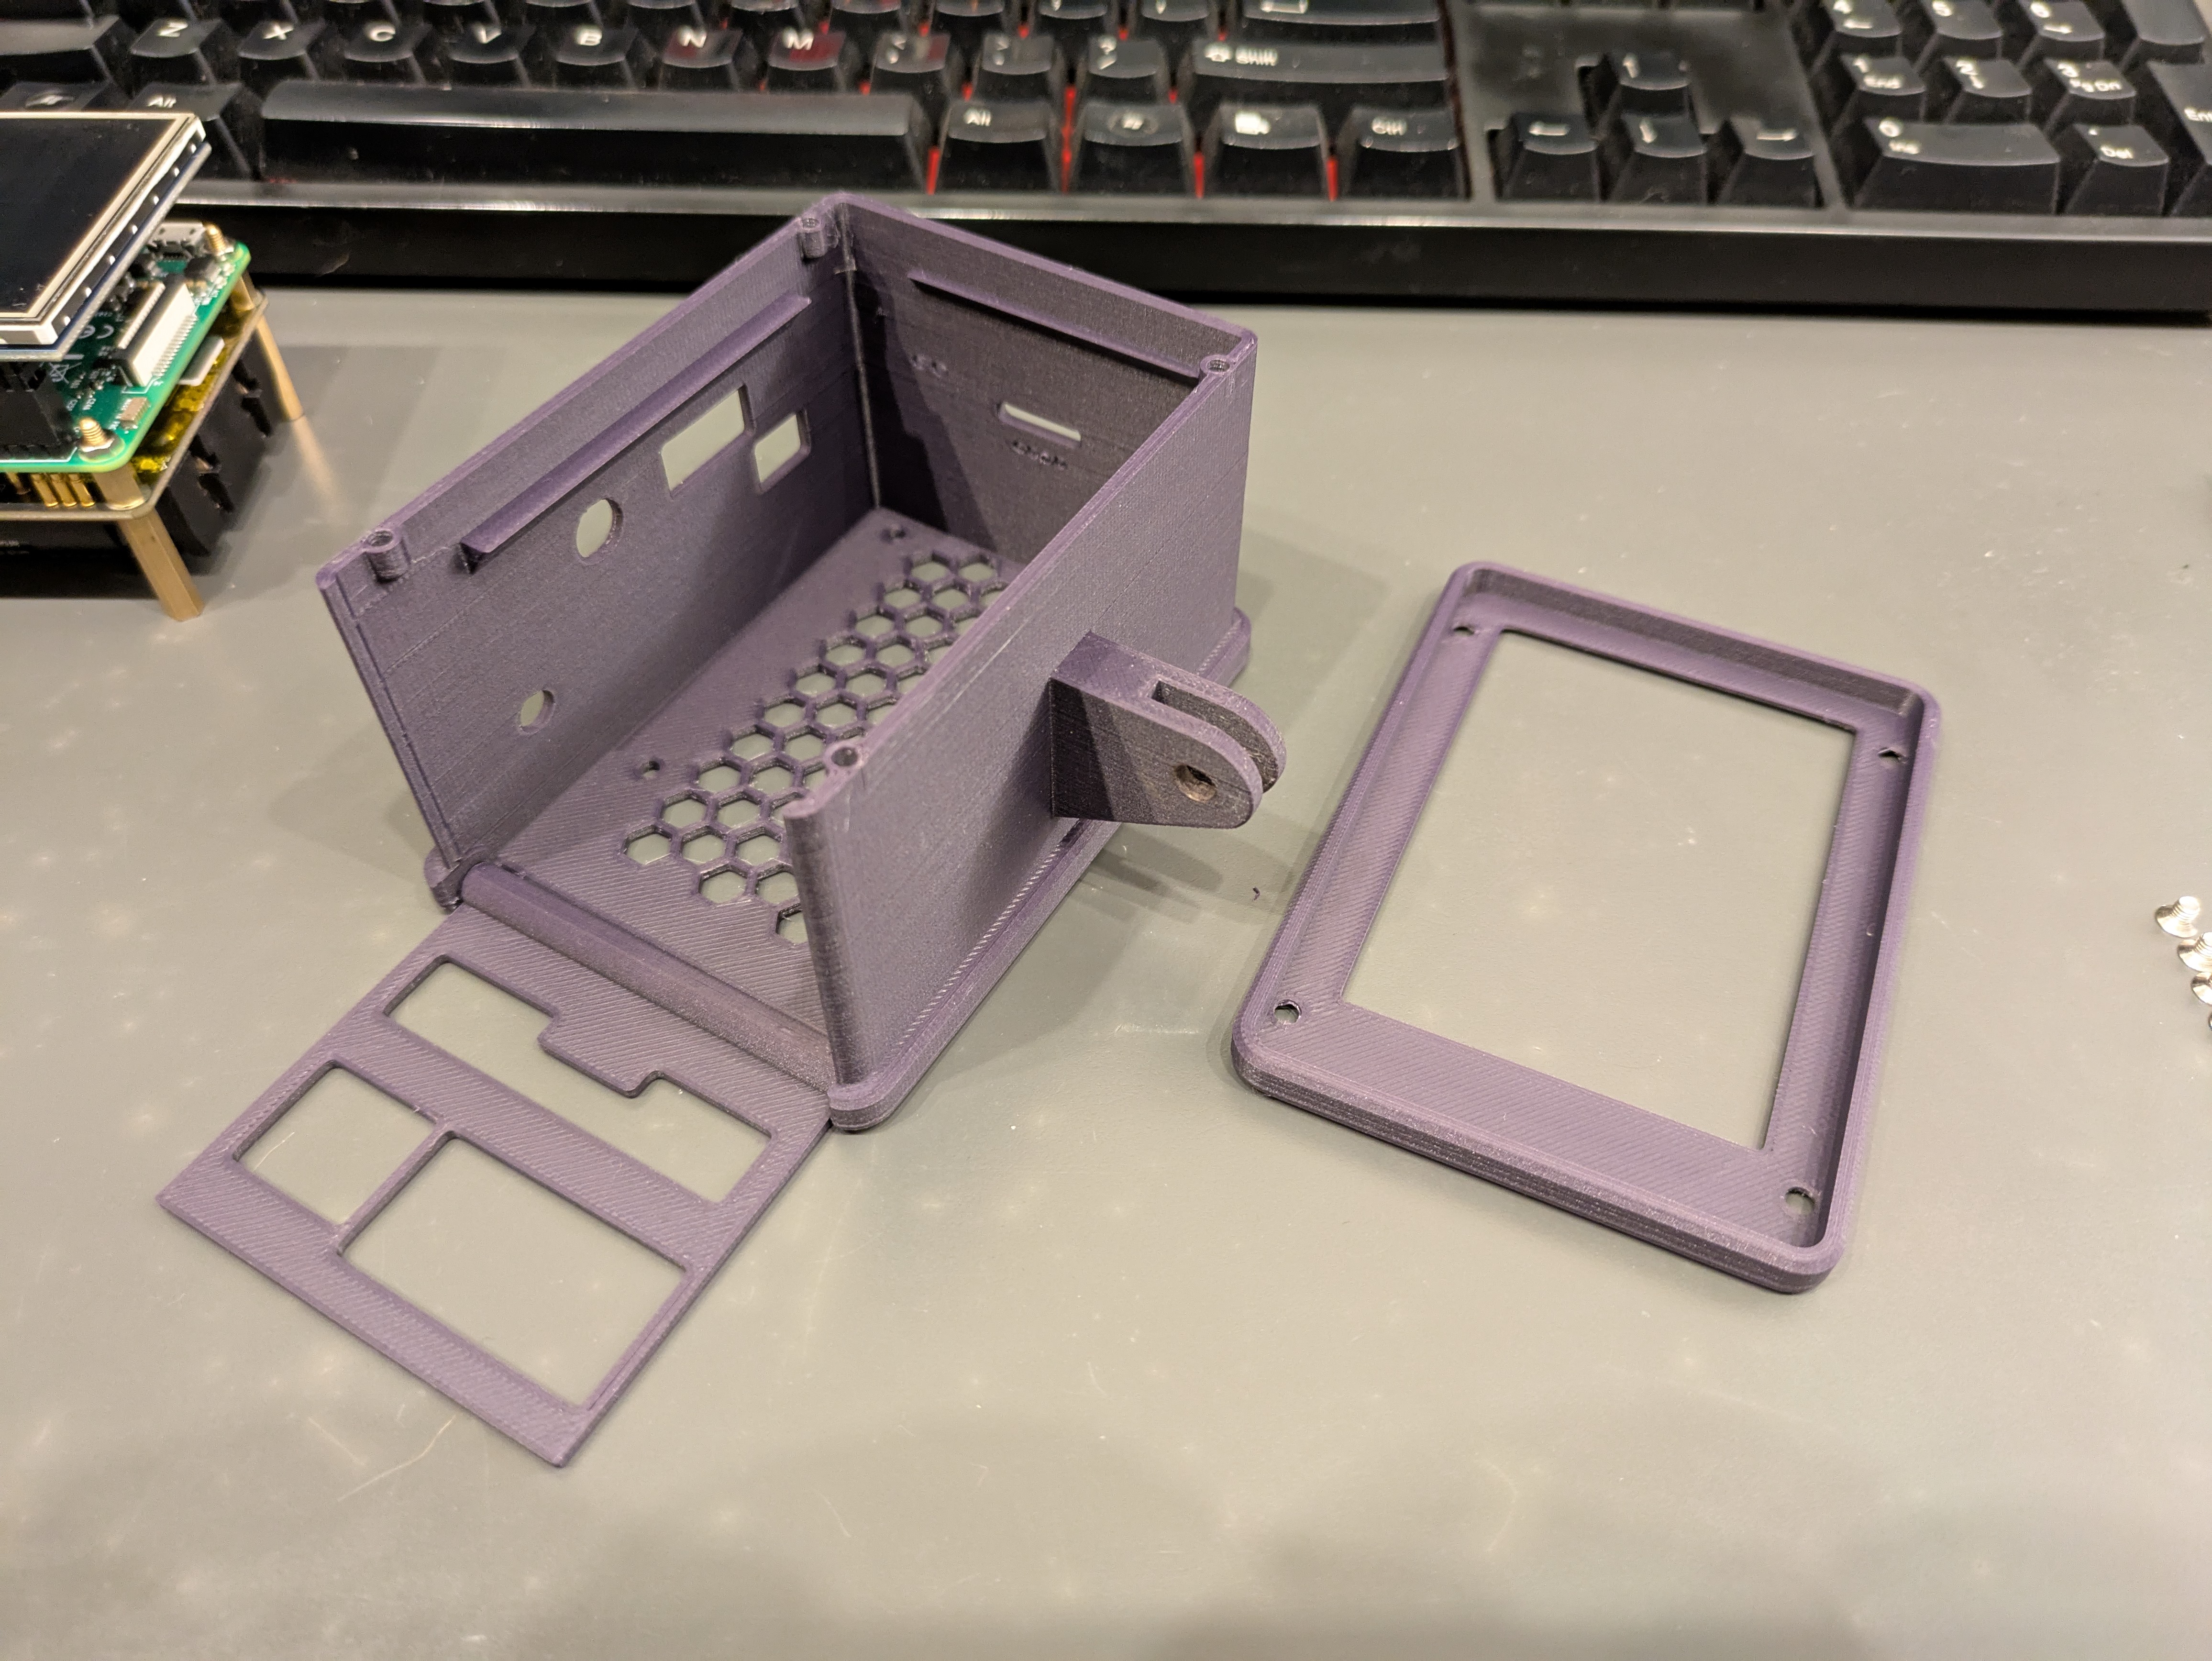
Of course, the real test was actually assembling this thing. It looked like it would work, but would it actually work with my components as designed?
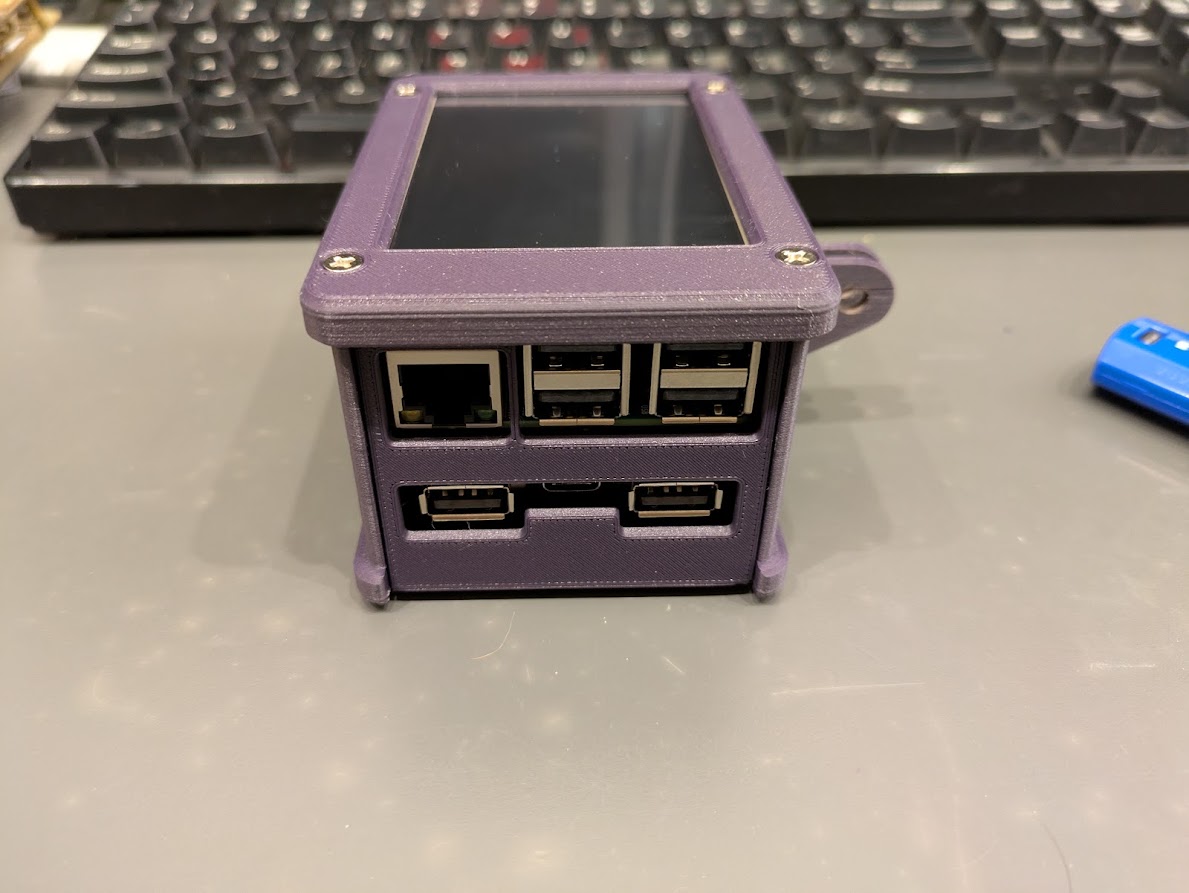
Designing clearances for various types of cable is actually quite difficult as it turns out. If you can’t get the ports to basically come in contact with the inside of the box, you’re going to have to make large relief holes for the different types of cables. This box ended up having big gaping holes for all the ports, but the plan was to protect the guts of the device and that was accomplished so I’ll call this a win. Let’s admire this creation for a moment.

Now what?
Kali Linux comes loaded with tools you can use to get into all kinds of nefarious things. They all fall into a series of categories from detecting and analyzing potential vulnerabilities, to scanning networks and capturing traffic and beyond. But, by far one of my favorite things to do is snoop on wireless signals. I actually happen to have a good deal of experience exploiting weak wireless access points and I’ve successfully pulled of attacks on WEP as well as WPA systems in the past. So… wardriving it is!
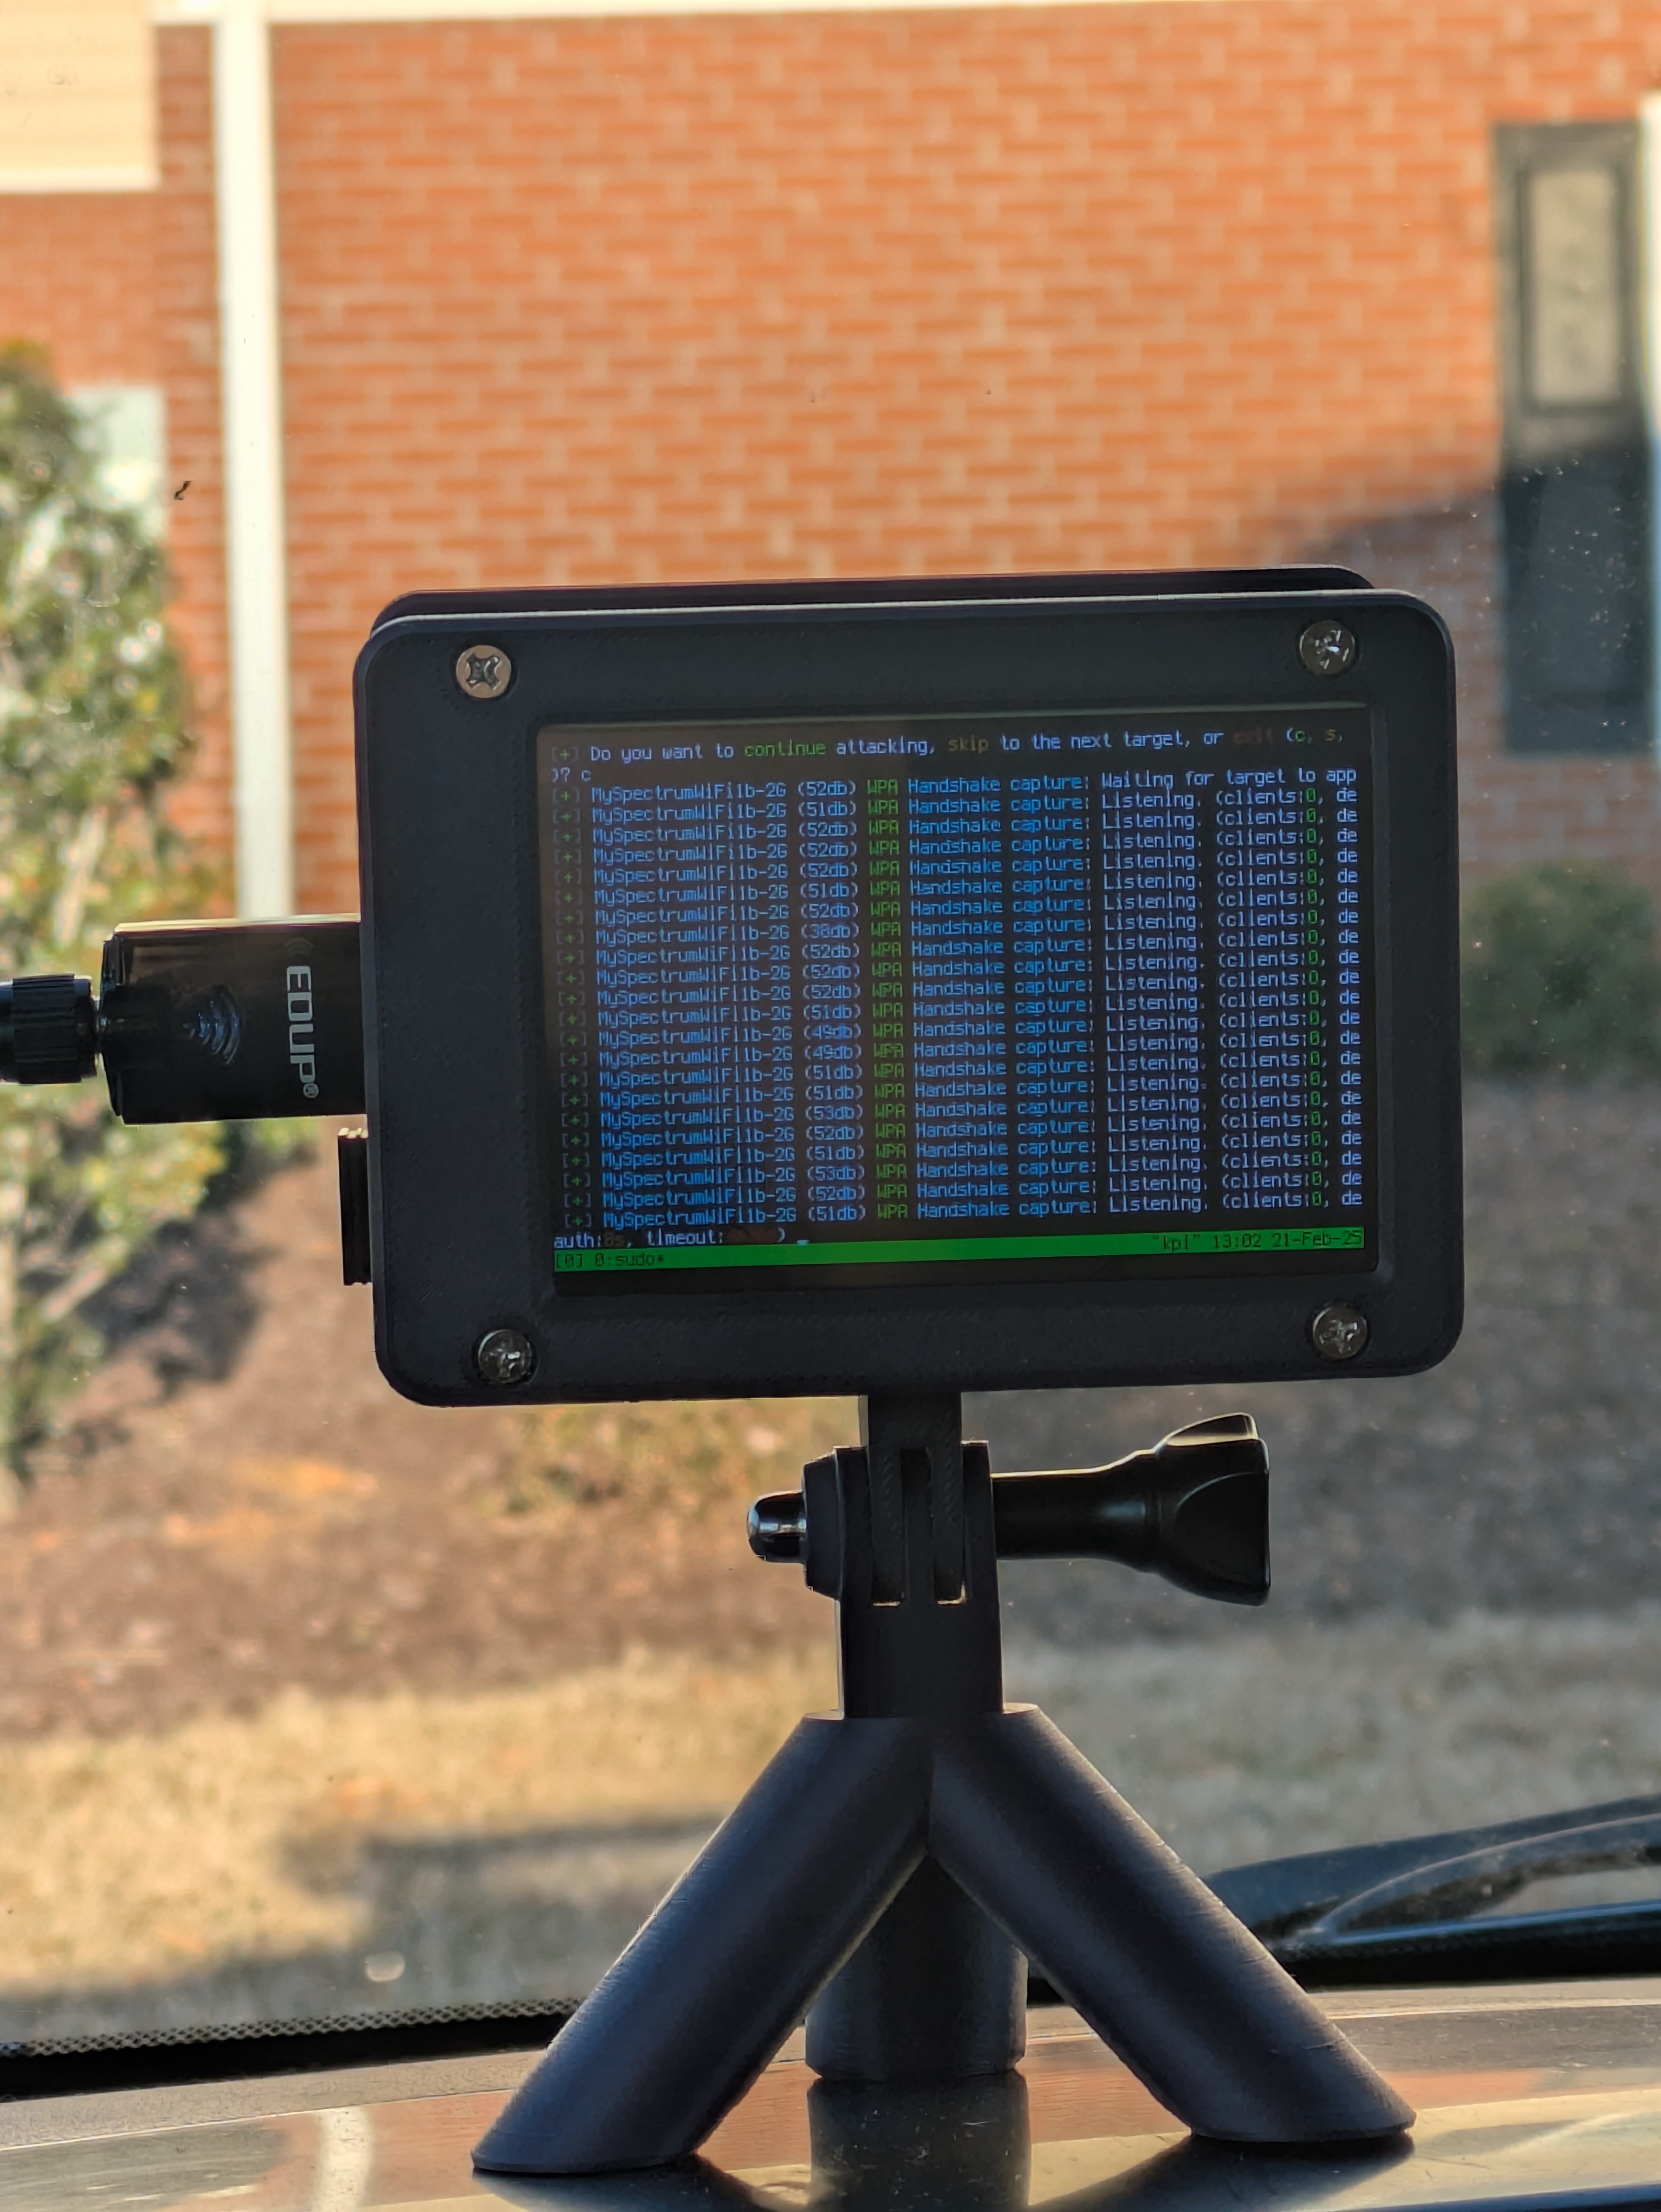
Wardriving obviously
Back in the hay day of wireless cracking, there used to be a lot of either fully unencrypted networks, or WEP networks. WEP was by far my favorite to attack because all you needed was enough traffic to decrypt. I don’t know much about the details of the actual attack, but essentially the workflow was like this: collect traffic until you have enough initialization vectors, run the capture file through aircrack-ng, wait a few minutes, profit! This meant that, for the most part, your network could be pwned no matter what you did to protect it. It also meant that driving around with a laptop collecting wireless signals could get you free wifi pretty much anywhere you went. Ah, the glory days!
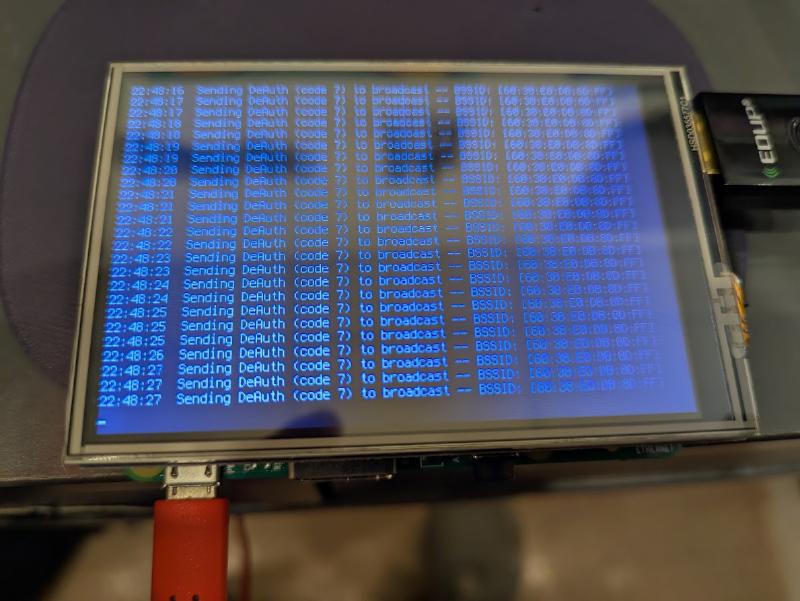
Today however, it’s way harder to do anything useful wardriving. You can collect the names of networks, and there are definitely some vulnerable ones out there still, but you are relegated to guessing the password using a dictionary attack. You also need to be listening at just the right moment to capture that delicious 4-way handshake when a new client connects to a wireless access point. This may take a really long time depending on whether or not clients are actively connecting to the network or not. But fear not! You can help the process along with my favorite way to be a pain in the ass: deauth!
Like Oprah handing out free cars, I too can give everyone a gift they will wish I hadn’t. Deauth packets can easily be injected, forcing clients to disconnect and reconnect at will. If you send one or two deauth packets, the blip will barely be noticeable and you have a solid chance of capturing the handshake in return. If you spam deauth broadcasts to all clients, you can execute an annoying denial of service attack and everyone will think you’re just soooo clever.
Once you have a handshake, your fate is sealed. Or more accurately, you can turn off the wireless sniffer and use the captured traffic offline with a dictionary attack. It’s pretty easy to find decent password dictionaries online, and you can make your own with different tools that Kali ships with if you want to be extra ambitious. I took all the lists I could get my hands on, strapped them together with the linux cat tool, sorted and removed duplicates, and dropped any password shorter than 8 chars (minimum for WPA). My little device could barely crack 30 passwords per second on its own, and with 15 million passwords to try, the math wasn’t working in my favor at all. BUT, I also happen to know where I can find effectively unlimited power to make quick work of really long password lists.
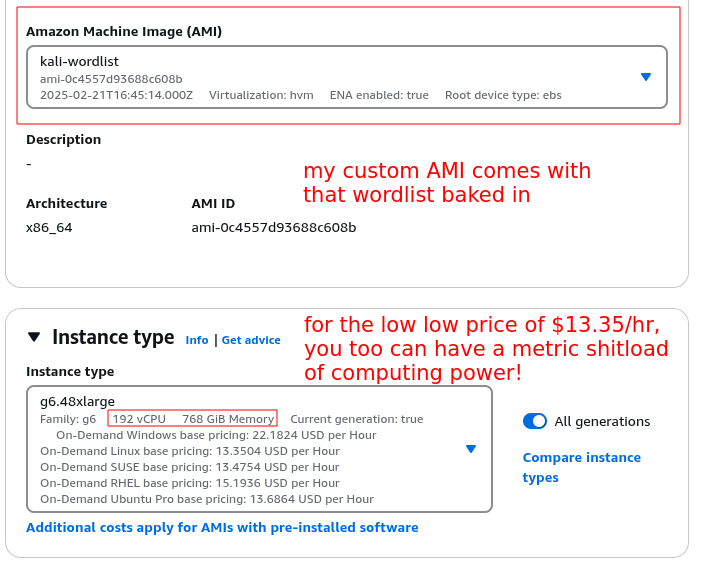
On a fairly stock standard EC2 instance with 32 CPU cores (I haven’t even played with GPU yet), I could crush about 30,000 passwords per second. That’s more like it! I also built my own Kali Linux image with the wordlist I wanted to use baked in. This saves time uploading large files, and it comes with the software I want pre-installed so it’s literally as easy as launching the instance, copying over the handshake files, and telling it to run in the background and write any found passwords to a file. Just don’t forget to terminate the instance or you’ll be in for quite the shock with your next month’s AWS bill.
Future project ideas
So far this is as much as I’ve had time to do. I’m forever cursed with ideas I want to implement and not nearly enough time to actually do any of it. But, if I had infinite time to play around with this thing, here’s a short list of things I want to try:
- Automate the handshake capture and upload/crack process. Use the AWS API to make this fully automatic.
- Configure an evil portal to capture other credentials with a fake access point
- Use it as a reverse shell when connected to a network
- Connect it to my Flipper and see if they’re really the dream team haxxor crew I think they could be
That’s it. I’m tired of writing and this list isn’t going to get done on its own so I’m ending it here for now. I’ll post an update if/when I manage to do anything new and interesting. Thanks for reading.